Shortly after the engine build in 2015, I replaced the OEM pistons and twin head gaskets with some Wossner low compression pistons. Since then, I’ve heard nothing but bad things about them from the 1.8T guys. It’s so bad that most engine builders refuse to fit them  . I wasn’t aware of any issues until I ran the engine low on oil at Ringmeisters in 2019, when upon disassembly and inspection I noticed severe wear to the Gudgeon pins.

I put this down to the low oil pressure even though I was surprised that the hardened pins had worn and not the bronze insert in the conrod.
I ordered four genuine replacements from Wossner and fitted those during the rebuild.
This week, when inspecting the engine trying to find the source of the oil consumption, I found that yet again, pins had worn! 


This was completely unexpected. I run rifle-drilled conrods with under piston oil squirters. Since this engine was built, it has never run on low oil pressure. There is no way these should be wearing and if there was an issue in this area, I would expect the bronze bush in the conrod to wear first not the hardened pin.
This left me with no faith in the materials used during construction. Unfortunately, I didn’t accurately measure the pistons before 1st assembly so I am unaware if they have shrunk like they do in the 1.8T.
Rather than buy another set of pins which I fully expect to wear in a year and need replacing yet again, I bit the bullet, after plenty of research I bought a set of pistons by Wiseco which have a very good reputation. I bought 0.5mm oversize which would allow a machine shop to rebore the spare engine block allowing for a perfect hone finish.

The new pistons are the FSR designed piston skirt, whether I will actually notice any difference whatsoever is debatable. I guess the dyno may show a difference

The spare block was cleaned and then rebored to Wiseco specifications of exactly 83.00mm.

The cylinder head was inspected and I found light pitting on the exhaust valve seats. I spoke to the machine shop and they said that would easily cut out without removing as much material as I feared.

The cylinder head required 8 new exhaust valve guides but the inlets had almost no wear and the machine shop did not recommend changing them. The head was checked for level and was found to have no distortion and did not require a skim so after a light recut of the exhaust valve seats it was ready for a very light valve lap with fine paste to get the perfect seal. Even though the inlets were matched the the corresponding port, they needed a tiny bit of lapping.

The big end bearings I fitted last year showed almost no wear. Checking this with plasti gauge confirmed this so they were reused. The accusump is used before starting and this ensures the engine always has oil pressure when turning, either being started or when on track. The condition of the bearings backs up the low oil pressure on starting or in use causes bearing wear which is what you’d expect 

Piston ring gaps were set to ‘Blown Race Only’ taking dimensions from the supplied paperwork.

83mm converted to inches then multiplied by the ring gap per inch from the table above gives 0.022″
I used a Dremel with a cutting disk cable tied to a board to grind the piston ring. The pins you can see were used to ensure it stayed square to the disk. I practiced on an old ring to get a gauge of how much pressure was required to take material off the piston ring. Its one of those jobs that just takes patience and a little bit at a time rather than trying to take it all off n one go.

The piston ring was squared in the bore by using an old piston with a ring in the corresponding groove to the new ring being measured. This ensures the new ring sits square in the bore.
Matt bought a great set of feeler gauges when we were setting the valve clearances on his solid lifter S54 engine. One half is even, the other is odd. This is the even side going up in 0.002″ increments. Not having to stack feeler gauges to get the required thickness makes life much easier.

Piston ring gapped, adjustment only made on one end ensuring the finished gap is parallel.

A set of inconel exhaust valves were sourced from SuperTech. I don’t believe these are critical but as I mentioned in the trip report, I wanted to fix the oil consumption cause which I am doing with the new bottom end using a new block and pistons. I am also putting measures in place to ensure that even if I have the same failure in the future, the uprated exhaust valves won’t melt by fitting the inconel ones.

The Supertech valves are the same length as the original valves, but the seat is closer to the edge. As I would soon find out, this is a problem.

The valve on the left is from an ABF head and uses a 3-groove collet. The middle one is from a KR head and uses a single groove collet as does the Supertech valve

The seat is definitely closer to the edge on the Supertech.

All lifters were stripped and cleaned before reuse

Head ready for assembly with Standard inlet valves, Supertech Inconel exhaust valves and Supertech uprated inlet and exhaust stem seals

Head assembled, you can see the top spring retainers are different on the single collet exhaust valves

Ready to fit !

The single collet spring top platform sits lower down the valve stem so I measured the springs to ensure they weren’t coil-bound. The spring preload increased by 2mm. The KR heads run the same springs but as the valve sits further into the combustion chamber and that adds more preload. I took this photo back in August when I was measuring up before the actual build to check. I’m comfortable that mine are fine as they are compressed less than the KR and more than the ABF, both of which use the same springs from VW

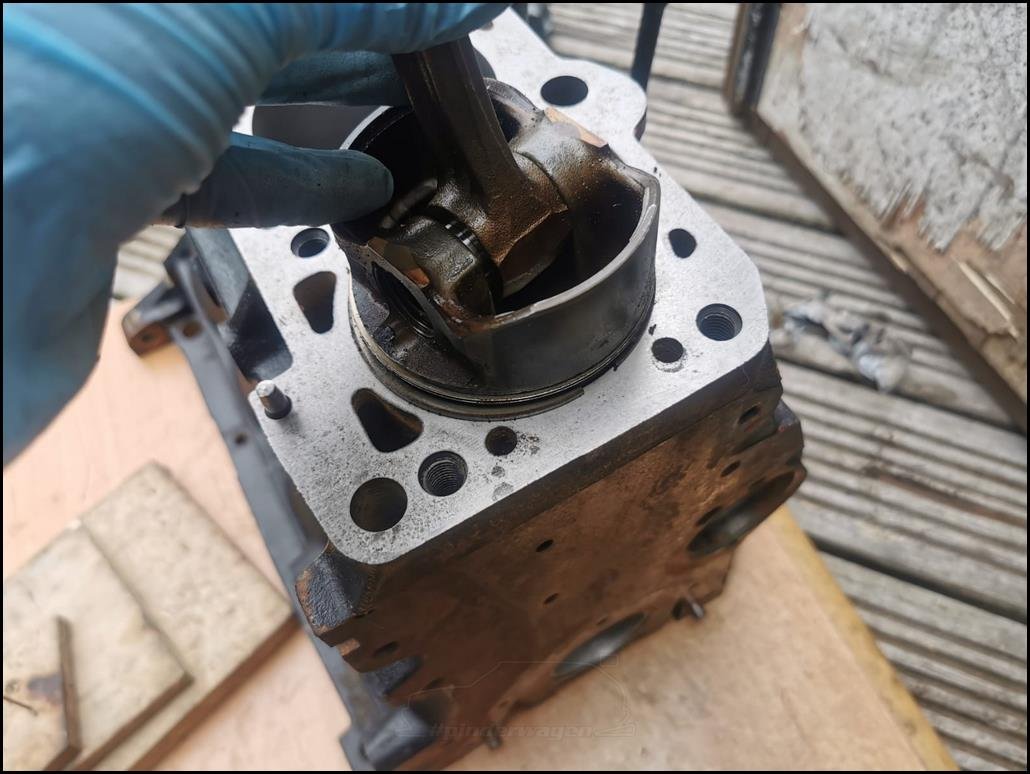
The oil squirter had to be modified to clear the piston skirt and the conrod. By grinding a corner off the base the whole squirter could be rotated slightly, then carefully bent to ensure it fit between the conrod and piston skirt whilst still aiming in the right place.

All pistons fitted. Crank was plastigauged before assembly and showed absolutely no wear from when it was fitted in 2019.

The standard MLS Head gasket is still suitable, you can see the oversize bore is still a smaller diameter than the head gasket.

Engine was fully assembled and refitted. Refilled with running in oil and turned over to get oil pressure with the plugs removed and injectors disconnected. This allows the engine to turn with no load on the bearings whilst oil pressure is built up.
When it finally started it ran badly. I mean really badly. They always sound bad when the lifters have been stripped but this was worse than ever 
After a LOT of investigation I found the issue.
Some of these photos have been exaggerated to highlight what the problem was.
The valves are all exactly the same length

From measuring valve stem to deck clearance I found the new exhaust valves were sitting higher than the stock ones.

Remember the photo of the new valve and the seat being closer to the head of the valve ? This means it sits lower in the head, which in turn lifts the end of the stem higher !

With the valve seat aligned, the issue at the other end is clear.

The problem was, the valve was sitting so tall that even when fully compressed the piston in the centre of the hydraulic lifter wouldn’t compress enough to allow the valve to fully close ! If I had been using solid tappets that wouldn’t have been an issue as I’d have just fitted thinner shims but with hydraulic tappets that wasn’t an option.
When the cam was rotated so the base circle was touching the tappet, the valve was held open just under 0.8mm. I hadn`t noticed this when building the head as the valve visually appeared to be seated when looking into the combustion chamber. It looked just like a standard exhaust valve.
After a lot of head scratching I came up with a solution. The piston in the centre of the tappet is split into 3 major components.
The outer tappet, piston, spring and the bucket. The piston actually has a removeable cap and ball bearing but that doesn’t need splitting

When compressed, the piston doesn`t fully insert into the bucket The end is still polished as can be seen on this photo, that`s the bit that never goes inside the bucket as the internal spring is coil-bound.

As an EXPERIMENT I manually ground down a piston by 2.5mm.

The smaller piston ready to fit into the bucket.

I also reduced the bucket height by 0.8mm. No point making the piston shorter if the bucket becomes the limiting issue

That was assembled and fitted into a tappet. Cams refitted and I could now further compress the tappet when the cam base-circle was touching the housing. Basically, the valve wasn’t being held open by the tappet and the piston could compress into the bucket sufficiently.
Took a handful of tappet-pistons to a local machine shop and they turned them down by 2.2mm

Assembled the 8 tappets, refitted into the head and the engine started and after the initial noise whilst the tappets filled it ran smoothly. What a relief !
This was far more work than I expected. After speaking to a friend who has just built a head with supertech valves, he measured the lash and found exactly the same issue. His seats had only been cut once and the valve was only held open by 0.4mm, but that’s obviously unacceptable and he’s going to modify the tappets the same way I did.
We could get the valve stem machined down but that would move the collet closer to the end and I don’t want to introduce a possible failure point.
I`ve been in touch with Supertech about this and it’s something they are looking into for the next batch of valve they manufacture. As I mentioned earlier, most people who fit these go for the full supertech top end which is titanium retainers, new springs and most importantly solid lifters. All they do it fit thinner shims so this isn’t an issue. I don’t need all that extra stuff, it’s just if you are chasing high revs which I’m not, hence sticking with the hydraulic ones.
The engine was run in over a week when I had chance, the oil was drained and refilled with 10W40 synthetic and I have since completed several trackdays where oil consumption is back to the miniscule levels I expect. A much more involved rebuild that expected but for the abuse the engine gets, it was necessary.
Dyno in a few weeks to finish the calibration.
Somewhat surprisingly I`ve had a few messages from people asking if they can support me in some way. I`ve set up a buy-me-a-coffee page for those of you who would like to do so, it allows the opportunity of making a small donation towards future Golf development  .
.![]()