Post Anglesey Manifold failure & repair
I had a failure on my manifold, appears to be along the Fusion line.
The penetration was good, might not look it from the photo, but it was as good as any other on the manifold, top of the collector was ground to a taper before welding, current was plenty strong enough and there was visible penetration on the inside after welding.
This has lasted 1 and a half years and it subject to extreme temperature changes, from ambient to several hundred degrees C. It`s made from SCH40 Mild Steel, with a wall thickness of 3.6mm
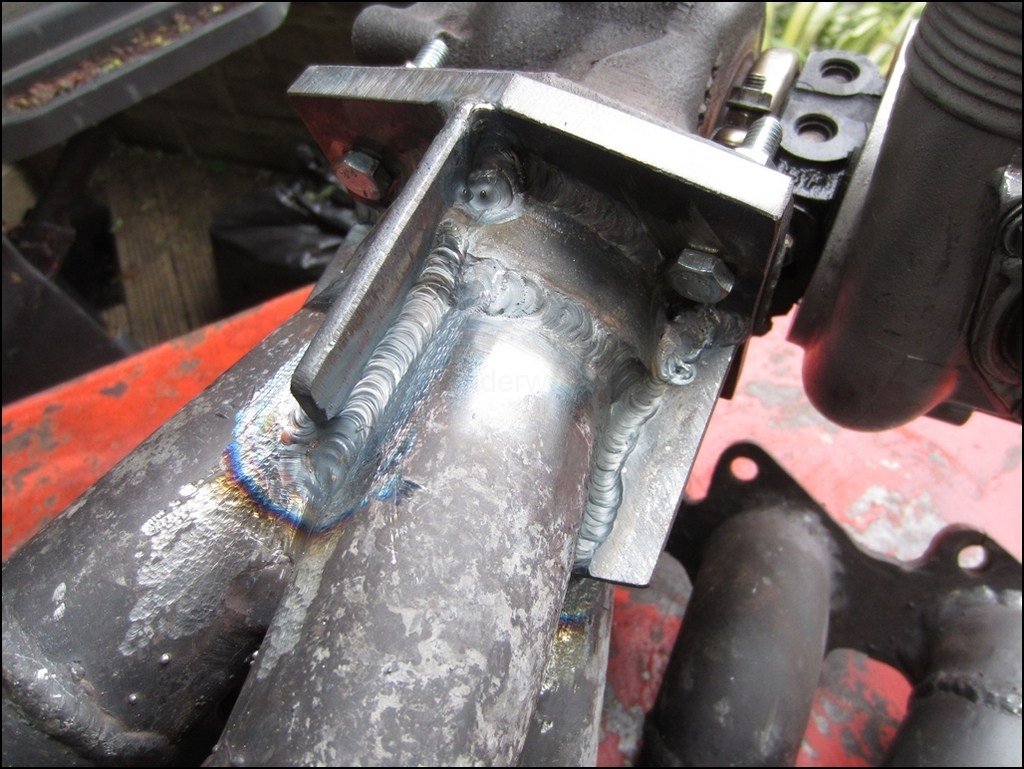
It`s cracked along the red line as marked on here

Close-up of the crack. Note no apparent cracks on the vertical collector welds.

Removed the engine.
Turbo lifted straight off the Manifold, as expected…

Flange broken clean off the collector.

The gasket showed ZERO signs of even lifting, never mind blowing. Very pleasing.

Head flange > manifold weld showing zero signs of any cracking

Externally, the collector weld is as good as the day I did it.

Close up of the flange. The weld is still attached and has great penetration. The crack is all along the Fusion line, and it`s sheared straight through. Lending a lot of support to the suggestions of leverage from the exhaust rather than a weakness in the original build. This is obviously very pleasing. I know it wasn`t a bad weld from my, just a lack of bracing. I can easily fix this 

I believe the inability to brace this particular turbo from the rocker cover area (no bolts, it`s all Circlips and V bands) means the downpipe up to the flexi is acting as a lever on the Turbo.
As shown on this photo. The main Flexi would be just off the bottom of the photo. The section of downpipe from the Turbo to the Flexi isn`t braced.

If I just braced the downpipe as it is, when it expanded, it would put force on the turbo pushing it the other way as the pipe expanded.
What I`m going to do is fit a 4″ flexi, right on the Turbo outlet. Then I`ll have to try and make a new S bend to meet the old downpipe.

The downpipe between the turbo exit Flexi and the main flexi will be braced to the block. Any exhaust system movement will stop of the main flexi. Any downpipe moment will stop at the flexi before the Turbo.
I could probably have rewelded this, fitted it and have it last another year, but this project has never been about just fixing it?
I wanted to beef up the collector > Turbo flange area, so I`ve been busy…
Cut off the top 10mm of the collector. Hopefully any HAZ that was affected has been removed. This meant the internal diameter of the top of the remaining collector is now too wide…

Made a new, thick flange. Still to `trim` (see yellow lines), but it`s bigger than the turbo flange on every side.

Bought a 3″ to 2 1/2″ concentric reducer, put it in a lathe and machined a groove on the top that just sits inside the turbo inlet from the manifold. 0.3mm side clearance to allow for any expansion


I made the hole in the centre of the flange tapered to match the reducer

Flange & reducer sat on Turbo

So the collector. Looking into the top

The reducer is round. See where this is about to go….

Reducer sits on TOP of the collector. It`s just a thicker piece of metal.

With Flange

After welding, I blended the interior of the collector to reducer. No photo, but the weld had protruded into the inside of the joint, as expected. This was ground away and then smoothed.

I`m pleased with that !

The finished, re-inforced Collector > Flange. This was TIG welded, not by me, my TIG welding isn`t that good ! Used Root & Cap, so basically a nice weld was done in the V of the joint, sealing the weld. Then this was built up and covered with a much wider weld `Capped`. Finally, the external cross was welded on, this was just a single root pass. The guy at work who did this was cursing me. As it heated up, the entire assembly was very hot. He couldn`t get in to weld some of the tricky bits without getting close to the tube and after a few seconds of welding, the heat started coming through his gloves 


Those who look closely will see that on some photos, the weld appears to move off the weld and onto the surrounding metal. This is done when finishing a run, so rather than stopping on the weld, you walk it off onto the thick metal and stop there. It doesn`t leave a cold spot in the middle of the weld, but instead on the thicker, solid steel next to it. I didn`t know that, he explained it when I asked.