The standard seats in the R8 are too high and won’t lower enough when wearing a helmet. There is no way to lower the factory seats so aftermarket ones were needed. I tried various seats but one of the biggest issues I face is the need to keep the R8 useable on the road.
I sat in a friends Imola seat in his E92 but the high sides close to your hips made access tricky and with the R8 being lower with longer doors, it simply isn’t suitable.

I looked at the Recard Pole Positions, but the back of the seat is too short and it`s not comfortable for people over 6′ tall with a long body compared to the Cobra Nogaro. The side and shoulder bolsters offer great levels of body support but allow easy entry and exit and the base profile allows the seat to be mounted very low in the car. The seat is designed to be used with a standard lap and diagonal seatbelt without modifications but also features harness slots allowing the use of a multipoint harness on track. Being able to use the standard seatbelt during daily driving is important, having to fasten a 6 point harness all the time soon becomes irritating on the road.
This isn`t a full on track car and compromises have to be made. These seats are no worse than the factory seats from a safety point of view but offer much improved headroom which is the whole point of me fitting them.

To fit the seat into the R8 I bought the Cobra seat Base which is actually the same as a MK1 Audi TT, universal slider kit and a pair of Nogaro sidemounts. Standard sidemounts do fit but they are much too tall and lose all the benefit of the Nogaro low fitting design.
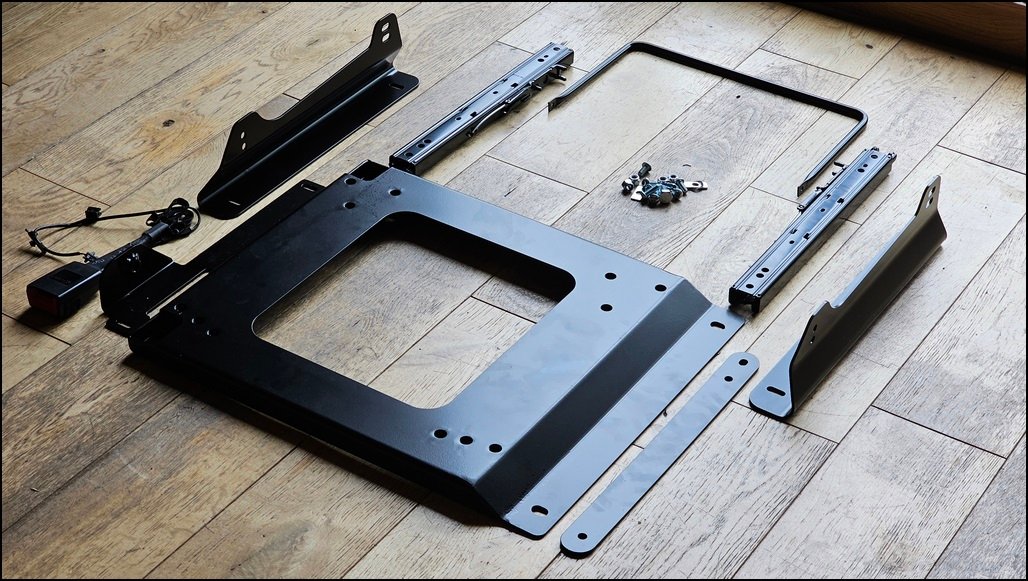
It’s a pretty straightforward kit to use but there are a couple of issues with it that need tweaking if fitting into an R8 as it’s a universal one designed for all cars, I’ll cover these later in this post.
The slider is bolted to the base using the shorter set of supplied screws. The narrower channel of the slider faces downwards.

Once secured, it was obvious the slider was blocking access to one of the mounting holes.

Remove the slider, cut out the small section at the rear


This will allow access to the base mounting bolt during installation into the car.

Secure the sidemount to the slider using the longer dome head bolt and nyloc nut. Between the slider and the sidemount is the seatbelt mounting bracket on one side and the spacer on the other. These are to allow the fitting of the seatbelt buckle to the base, just like on the original seat.
Ideally, you would bolt this to the floor, on a track car you’d weld reinforcement plates to the transmission tunnel but as I mentioned earlier, this is replicating the factory setup and whilst it would be preferable to remove the carpet and somehow fit a reinforcing plate to the aluminium chassis, that’s a far more involved job and not something I’m doing at this time. Would it be stronger in a big crash? yes, of course. Is the factory method suitable to pass all crash tests ?, Yes and that’s why I’m using the Cobra supplied mounting method.

Once mounted, the slider bar sits between the rails and clips into the corresponding slot and pin

It takes a bit of force to push in the bar but it clips into place nicely.

I then slid the slier backwards and hit my first problem. As it’s universal the bar touches the base making it almost impossible to get your fingertips underneat to lift it up.

Remove the arm. mark both legs 50mm from the end
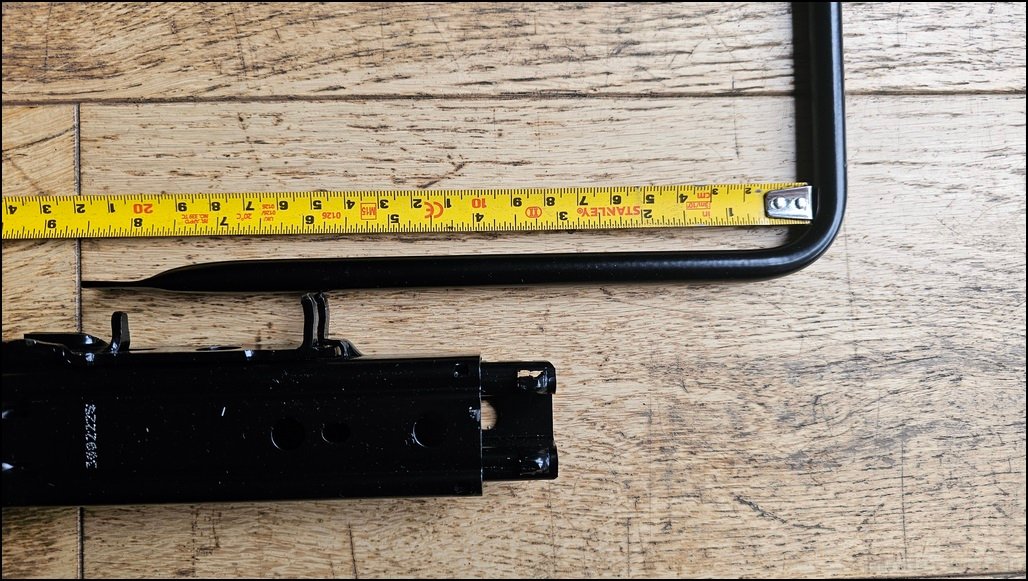
Bend each arm in a vice.

Refit to the base and now the slider can be lifted easily.

The seat can now be fitted to the sidemounts using the supplied high tensile bolts. I found it almost impossible to fit the bolt by the seatbelt bracket into the lower hole on the rear of the mount.

The solution ? Cut off 5 threads fro the end of the bolt. Before anyone complains, when tightened this does still protrude through the nut in the seat so still has enough thread engagement to be safe. I didn`t just cut off a bit of the bolt and hope it was ok.

The bolt can now be started into the threads much easier.

It has to be tightened with a spanner, you can’t get a socket on to torque it up correctly.

Everything on this Nogaro is designed to be able lower the seat as much as possible, this is shown by the clearance between the seat base and the sliders.

The issue is, the button head bolt is only marginally larger than the slot, so I added washers to spread the load.

I then test fitted the seats in the car and spotted something I`d missed during assembly. The bases are reversible but for some reason Cobra haven’t mirrored all the mounting holes so the outer drivers slider can’t be mounted far enough backwards. It needs a hole where I’ve marked the red circle to equally mount the sliders.
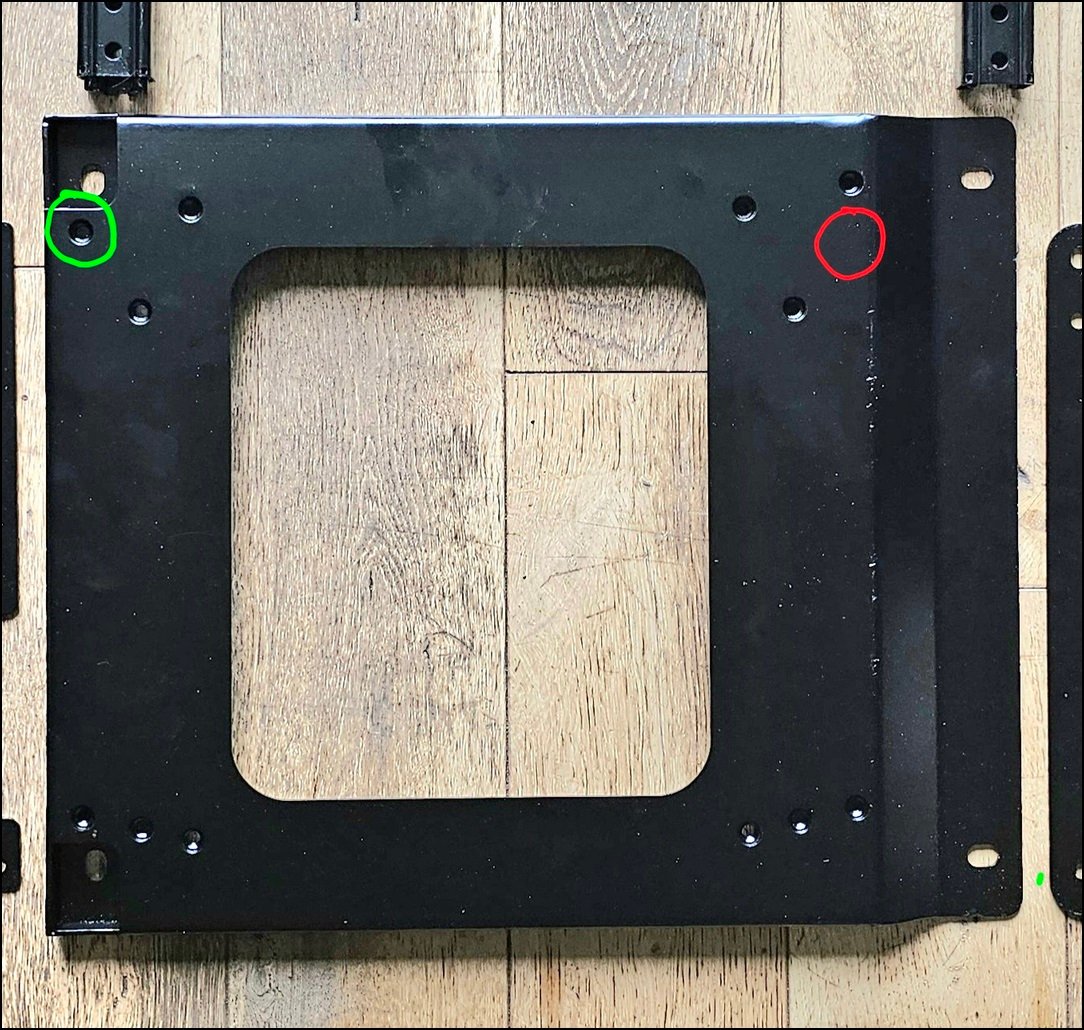
Not particularly difficult to drill the 4mm base, but it meant removing everything I’d just fitted to be able to do it and then move the slider backwards.

The standard seatbelt buckle sits too low on these bases so I bought a couple of A7 buckles instead. The part between the bolt and the buckle is longer and it sits at a better height. Part number is 8K0857755F. They cost under £10 from ebay.

If you were only using a 3-point seatbelt, that’s the assembly completed and they are ready to be fitted in the car.
The 6-point harness requires 6 mounting points on the car, 2 are behind the seat for the shoulder straps, one uses the OEM seatbelt thread in the outer sill. That leaves the tunnel side of the seat and the ones under the seat.
The tunnel eyelet it fastened to the seat base, I`m not going to repeat what I said earlier, I know a fully welded in spreader plate on the tunnel is preferable, but there isn`t room when keeping the interior so I have to fasten it to the seatbase.
That meant drilling the sidemount to be able to fit the eyelet through

I drilled high enough so the eyelet didn`t stick out much more than the width of the seat, but low enough so the nut on the rear didn’t foul the seat.


I then started on the 2 underseat eyelets. What a lot of wasted effort this turned out to be !
Taking inspiration from teh SWMotorsport bases, I mounted 2 eyelets to the seat base

First, I bolted a piece of U channel under the seat base, then fitted 2 eyelets
Then I mounted the seat, or I tried to. The eyelets were too high and hit the base of the seat.
OK, lets invert the channel. That’ll work.

Nope. still too high !
I was struggling by this point, then had a brainwave and tried a piece of L angle. Offering it up and this could be the solution !

The eyelets were mounted as high in the L as possible.

I welded the angle to the underside of the base.

Plenty of penetration, I`m happy with that.

Gave everything a spray in black and it’s ready to assemble.

As you can see, the bottom of the eyelet is level with the floor.

Finally refitted the seat one last time and the eyelets JUST clear the seat. Probably 3mm at most. That’s the issue, everything is such close tolerances I can’t just bolt it together and hope it works out, it needs a lot of checking and partial asembly to see where you have clearance.

Harness passed through the seat base and fastened to the eyelets

As this was the final fitting, I secured all the clips with the split pins.

Obviously this side faces away from the harness when it’s tucked out of the way so the ends don`t damage the webbing.

The seat finally mounted on the base.


It was time to fit the seat into the car. I think they look great and they are pretty comfortable too. Not quite as good as the OEM seats, but they have less padding so that’s not a huge surprise.

The harnesses can be fed through the seats when needed or tucked out of the way when I’m on the road. There is no harness bar fitted at this point, that’s next.

Back to the reason for fitting them, headroom with a helmet. This was with the factory seat as low as it would go, my head was pushing against the headlining.

With the Nogaro and the low seat base, loads of room !

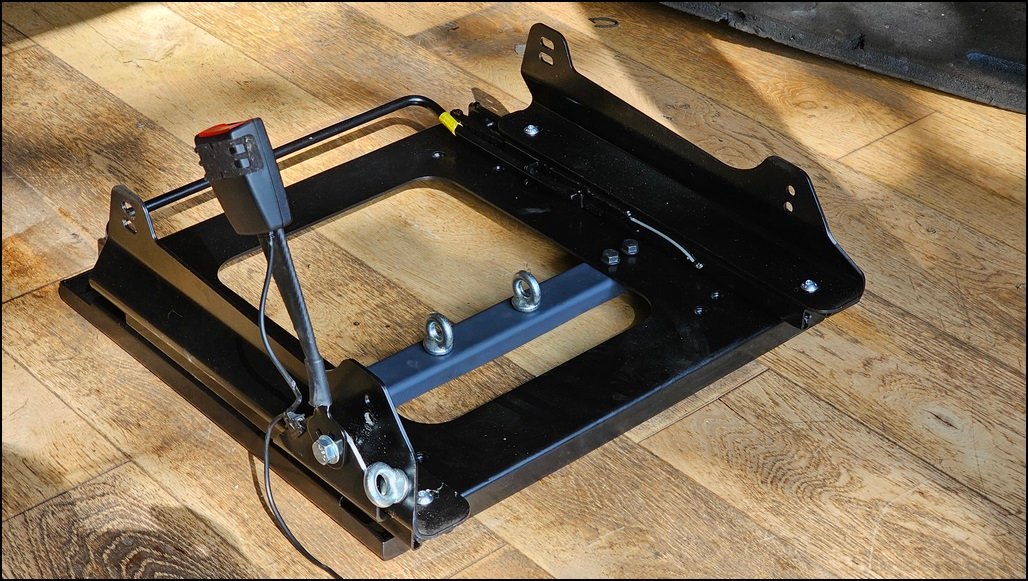
Using the proper connectorsI made a pair of Airbag delete plugs.

The simply plug into the sucket under the seat.
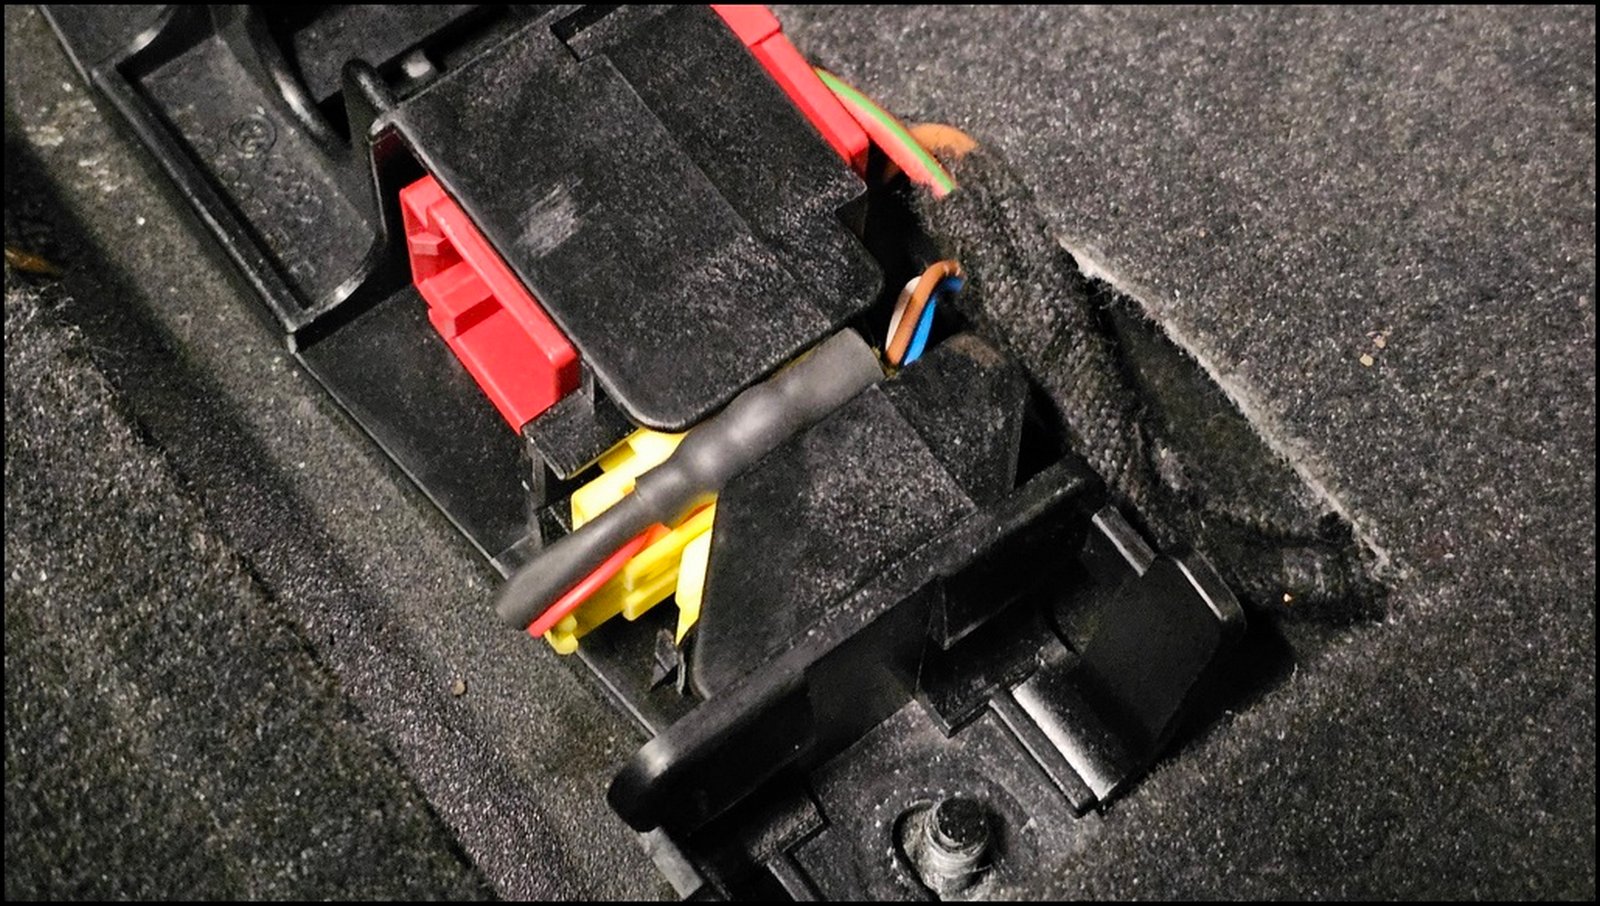
The seatbelt buckle contact was also connected to the socket in the same place, although I don`t appear to have a photo of that.
Overall it’s a fiddly job and wanting to use a 6-point harness made it a far longer job that necessary. I’ve already mentioned it but I’ll say it again. I KNOW it’s not as good as welding the plates to the chassis, but as the chassis is aluminium that’s obviously not as simple as it sounds. I decided to use the same method as Audi, ie fasten them to the seat base. Would it pass scrutineering ? No. Does it matter ?, no not really. I’m not going racing in it and it’s as secure as I can realistically make it.
The seats somehow make the cabin feel even larger. It’s a nice place to sit, but with them being that bit lower and having space on the outseide of the seat by the door just gives an impression of having more room. It took several hours longer than I expected, mostly due to the eyelet mountings for the harness.
Total weight of the base, sidemounts, sliders and seatbelt clip 9.75Kg (It’s heavy !)
Weight of the seat 7.25Kg
Total 17Kg
OEM seat 30Kg
Save 13Kg per seat, 26Kg in total. Not as much as I hoped, but the heavy base and sidemounts don`t help.