
The plate diff I fitted was a huge improvement over the LSD for track use but I was starting to see signs it was wearing out. The oil was getting far too hot and even after fitting an oil cooler it still didn`t perform as well as previously. It worked well during the first session but as the oil heated up the performance rapidly deteriorated. The loss of friction material on the clutch plates meant there was more metal-to-metal contact which was the cause of the higher than usual oil temperatures I was observing.
The inside wheel would spin up easier than before and then it would occasionally lockup and work as it should. This is when the friction plates are worn out, they slip but sometimes stick together when they get particularly hot which is why the diff locked suddenly.
I`d stripped it down when I bought it in 2016 KAAZ Plate diff stripdown It was 4 years old when I bought it and even though the plates looked OK, they were more worn than I realised and looking back at the photos in detail there was evidence of wear I missed.![]()
I often get asked where I get parts from and whilst I usually include a link in the post, people often miss it. I bought all the diff spares from TMS Motorsport
![]()
The last few trackdays were particularly bad and the diff didn`t lock at all so as part of the winter check I stripped it and the reason was immediately apparent.

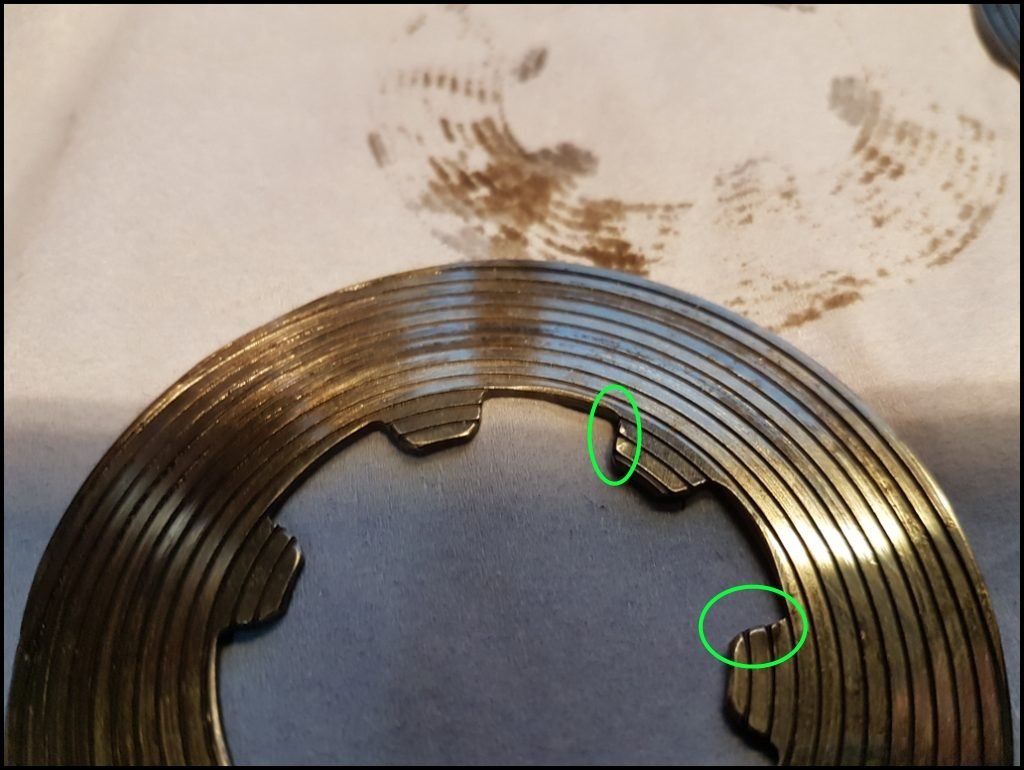
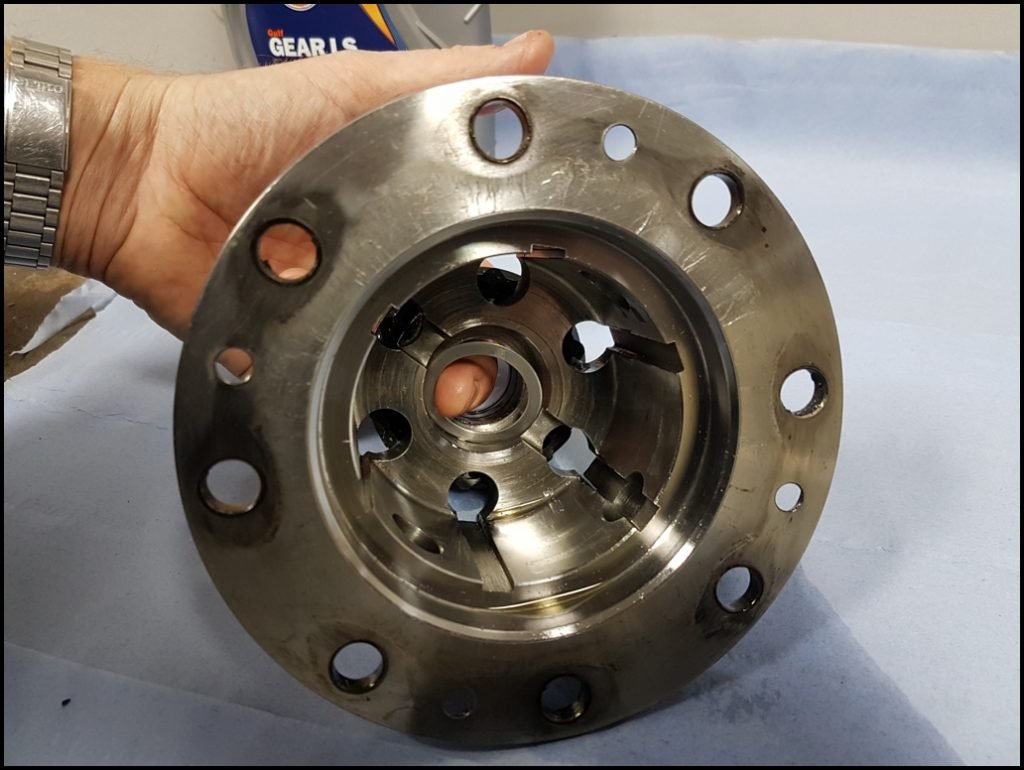
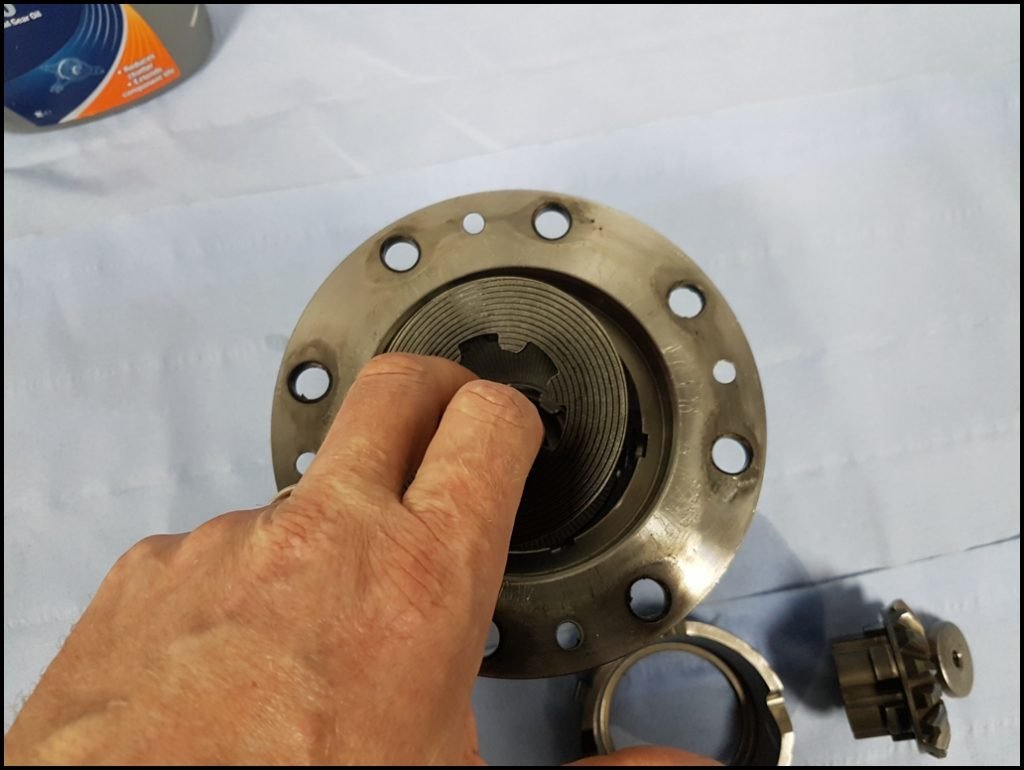
Upon stripping the diff I instantly spotted some broken tabs sat in the grooves between the inner gear and the plates.

The top plate has the inner locking tabs, they have snapped off the lower plate in this photo.

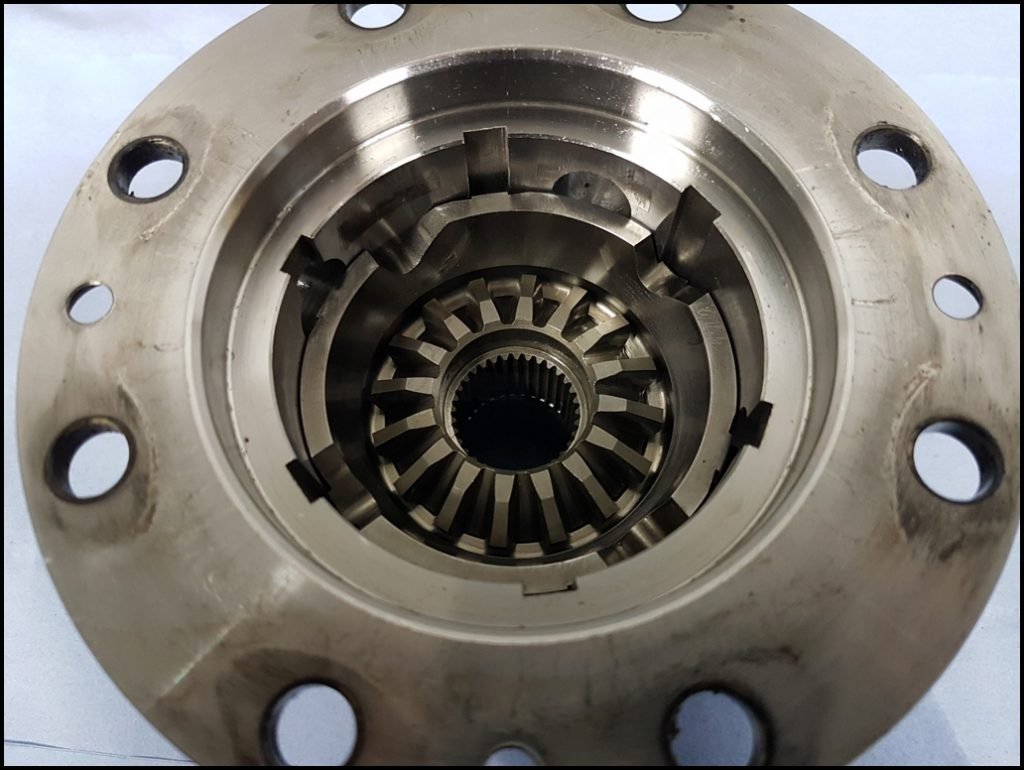
Closer inspection showed the remaining tabs were damaged, highlighted below. I believe this is from when the oil was too hot, the plates stuck to each other momentarily causing a shock load as they instantly locked from 0 to 100%. It was only a matter of time before they broke off once the plates wore out.
Sadly I didn`t have time to overhaul the diff when I first noticed the symptoms and had to wait until the winter.

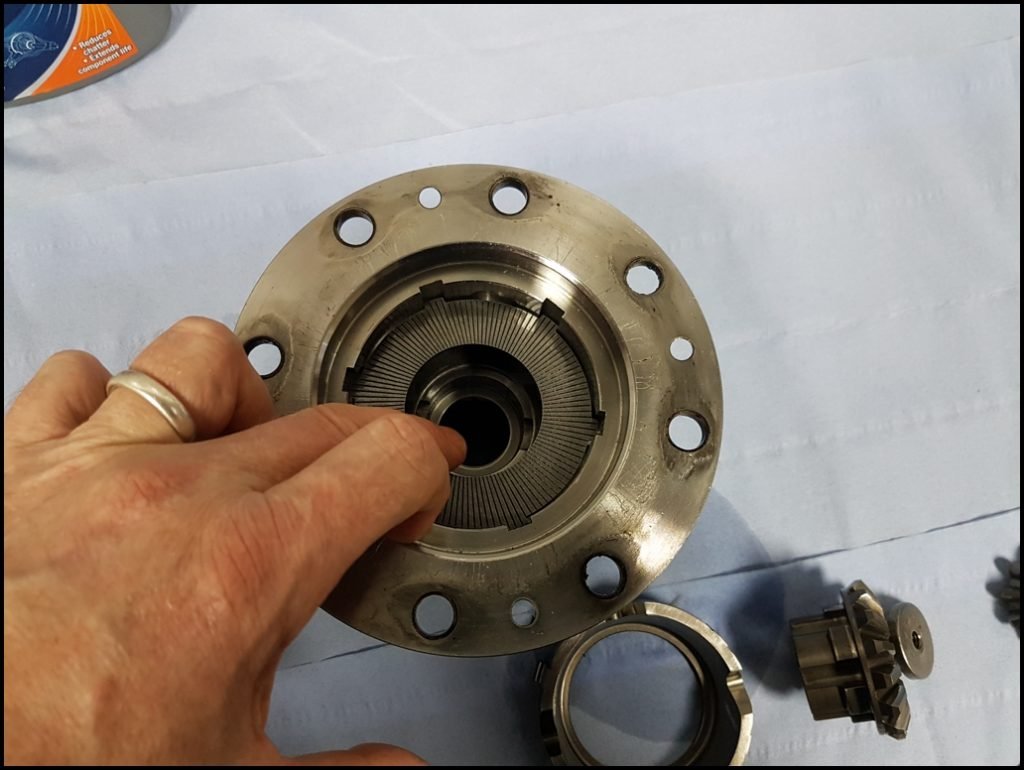
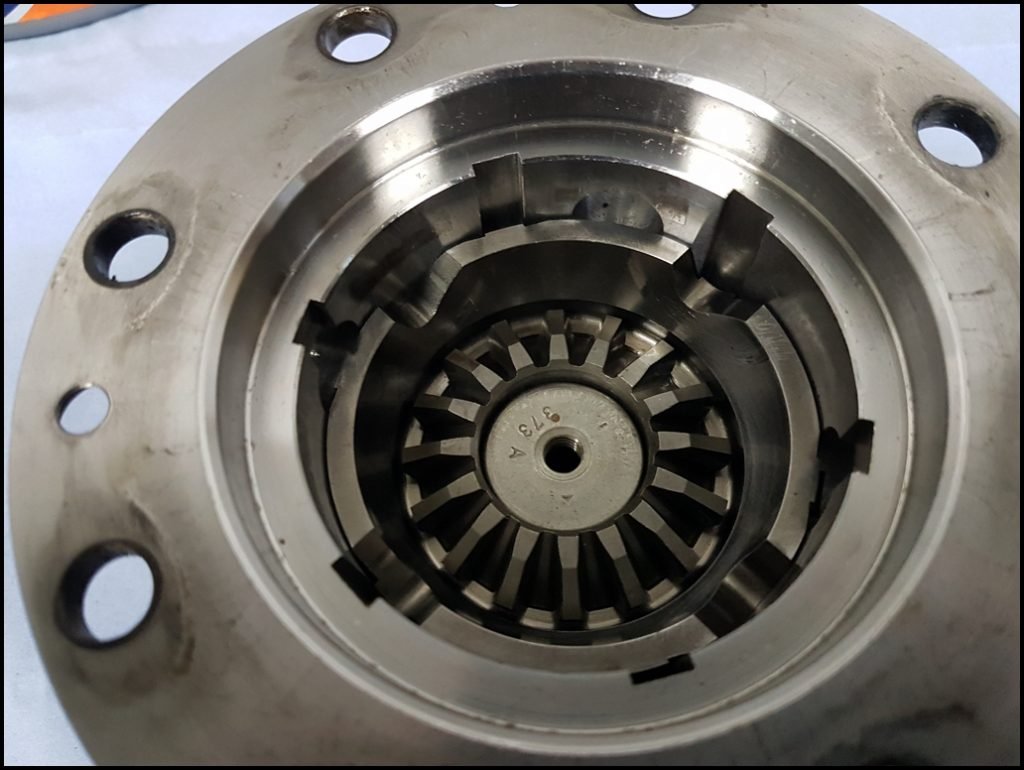
When stripping the diff debris was found all over the place.

The oil grooves on the plates were full of worn friction material.

Small particles of debris were spread throughout the diff.

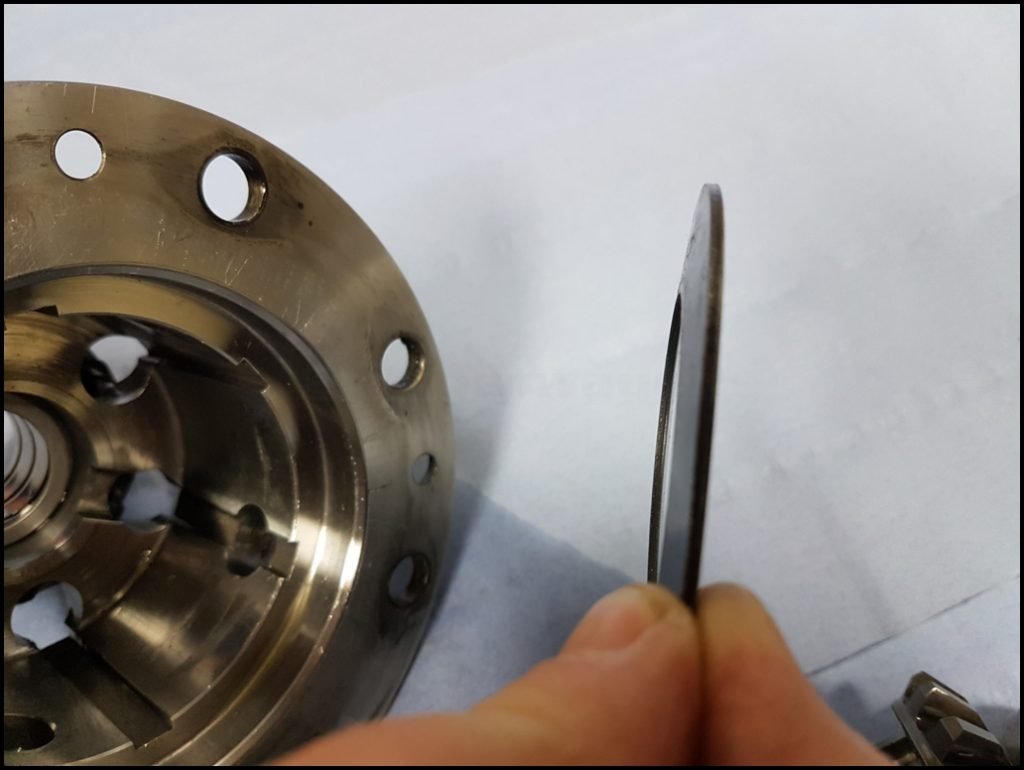
New Clutch plates ordered from the superb TMS Motorsport who were able to get the new plates to me the next day at a very competitive price. Highly recommended. ![]()


Comparing the old shiny plate to the new one it was safe to say there was no remaining friction material on the old clutches.


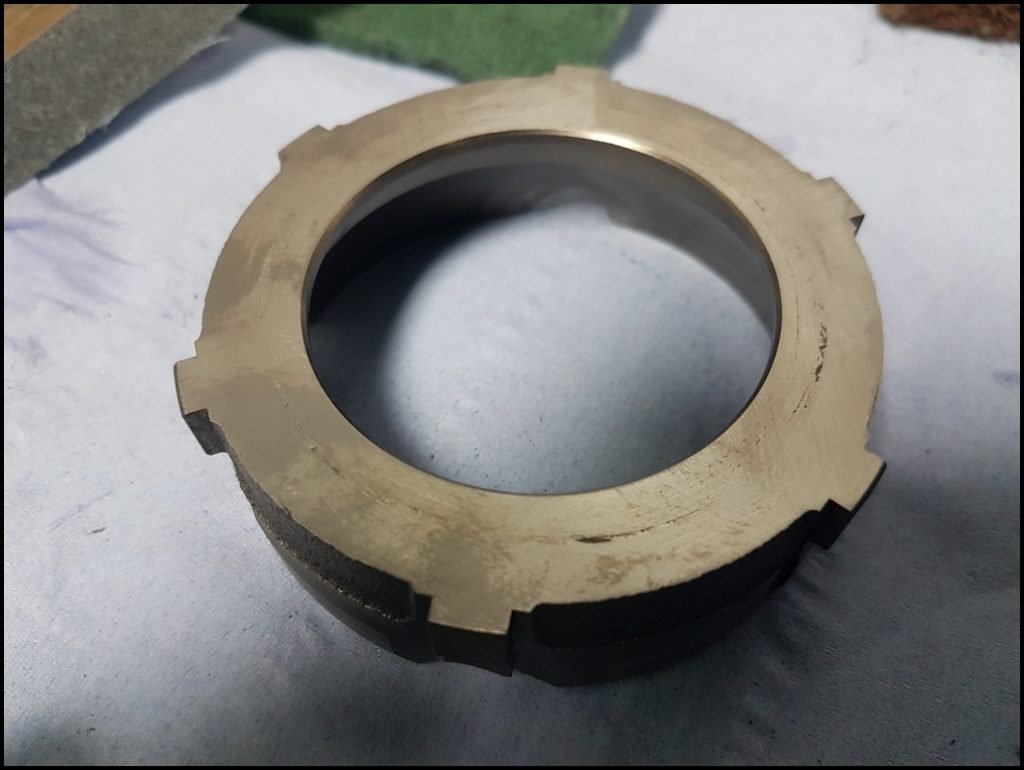
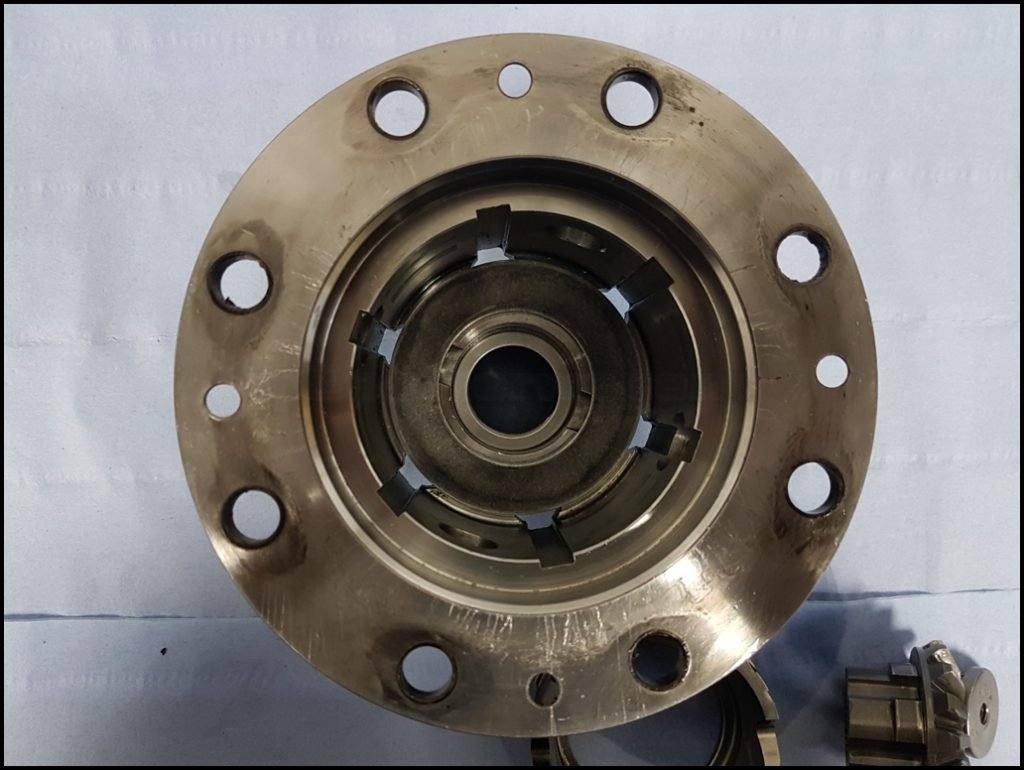
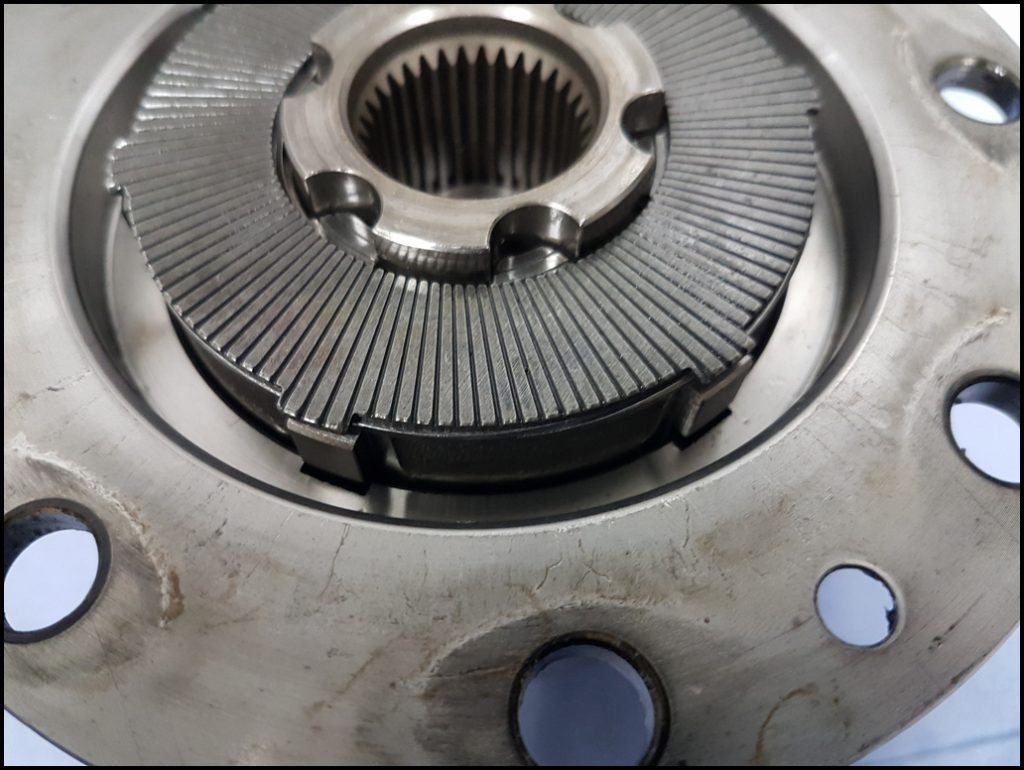
The rear of the centre casing showed wear and the plate next to this needed removing with a screwdriver and a tap with a hammer as it was `welded` to the casing.

A quick rub with some fine emery paper on a flat metal surface cleaned it up in seconds.
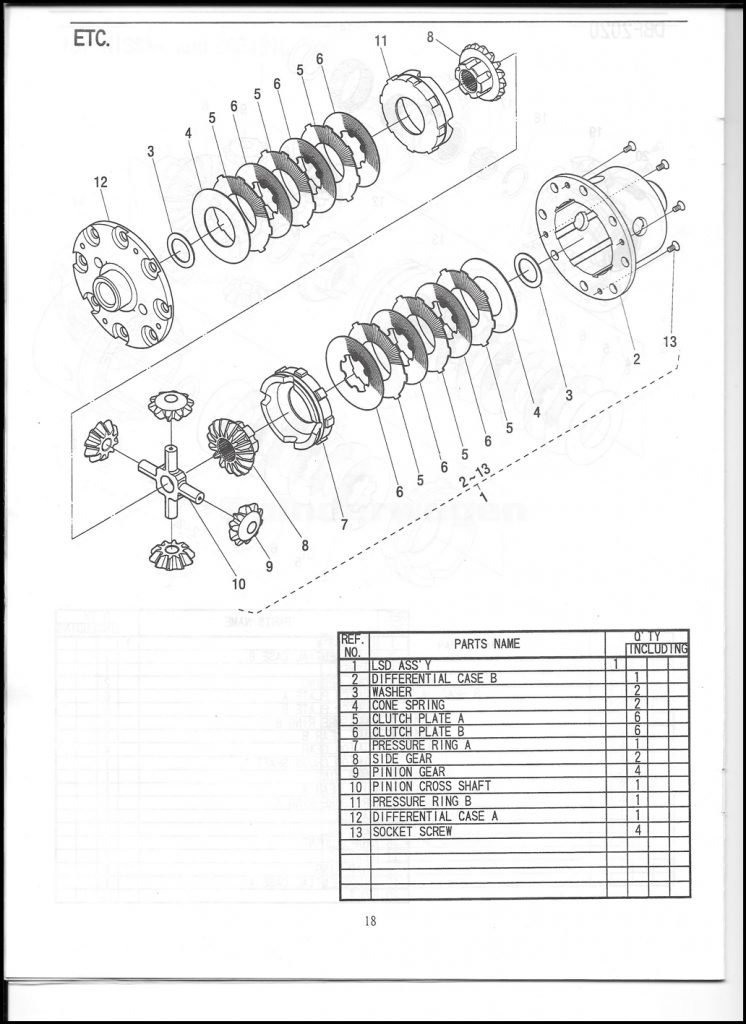
The Kaaz spare part list and information is hard to fine so I`ll share it here for completeness. Whilst mine only has 4 plates per side and this diagram shows 6, everything else is identical.
The overhaul kit came with new Cone Springs but Kaaz offer an upgraded one that gives a higher preload. Now I am used to the plate diff I felt this was a worthwhile upgrade as I don`t drive it on the road.
71265-104 Thicker Cone Spring Set

I will show every step of the rebuild, I realise it is mostly overkill but if you ever find yourself wondering which way the ramp angles should go or where a particular washer fits, this will show you.
As mine is a track only car I wanted the maximum lockup so followed the alternating plate setup. Road use can be either 65% or 35% depending on the sequence the plates are fitted.

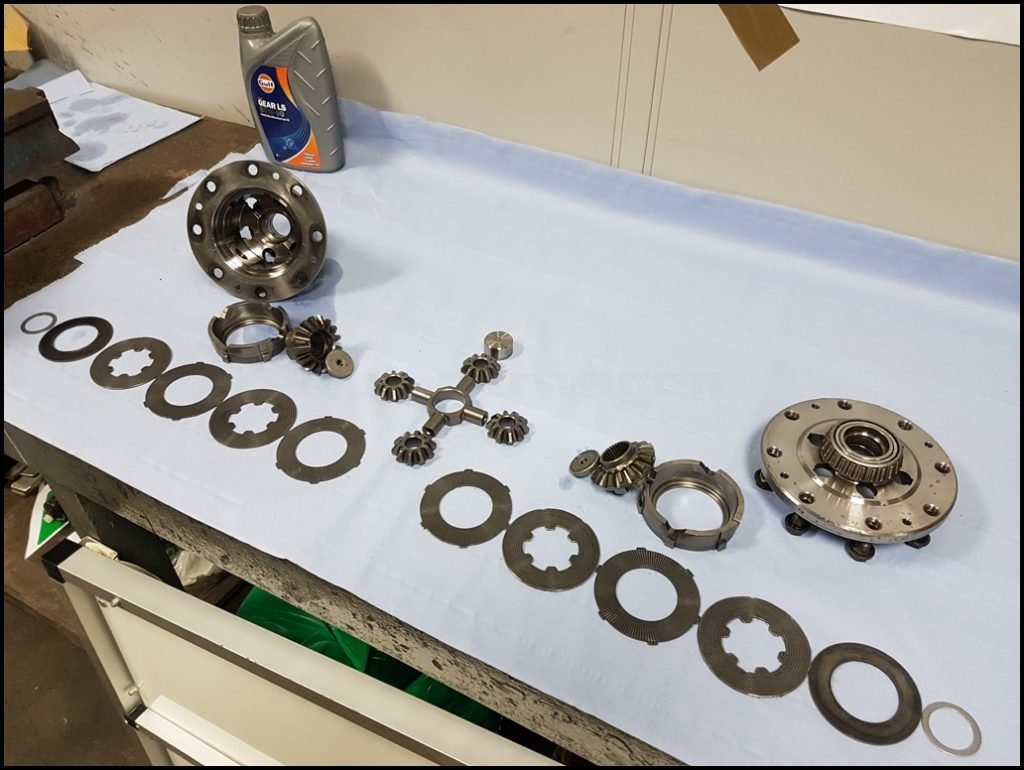
Ready for rebuild with new clutches and washers from TMS Motorsport . All the internal parts were dipped in gearbox oil before reassembly and then lightly wiped to remove the excess oil.
Start off with the small washer

This sits in the recess at the end of the casing
The cone washer is next
Inserted into the casing. The centre touches the casing, the raised part presses on the outside of the clutch plates
Start with the externally tabbed Clutch Plate A

This slides into place locating in the grooves on the outside fo the case.
Clutch plate B is next

At the moment, this sits centrally with nothing to locate it

The second A plate

Inserted

The final B plate. If you have more than 4 plates, just continue the sequence according to your requirements as explained earlier
Plates installed.

The pressure ring is next. Not the way the ramps are facing. The plates can be interchanged so it is important these are installed correctly.
The Kaaz diff I run has 40/65 ramp angles with more lockup on acceleration.

Slotted into the casing

Next is the side gear The grooves on the gear need to line up with the inner tabs on the Clutch plate B`s.

If you look closely, I have rotated both the B plates so the tabs align and th gear can slot into place

This should drop into place easily with only a slight wiggle neccesary to locate the plates into the grooves
My diff uses bolt in drive flanges so these threaded rings are next. A `push in` style won`t have them. The small notch located in the inner splines to stop it spinning when the bolt is tightened to secure the flange into the diff

The spacer comes next


That`s half of the assembly complete. The pinion gears go next and these slide onto the central cross


The cross sits in the ramp on the pressure ring

We work backwards now, reversing the process already completed so the threaded ring goes in facing upwards

The centre of the cross holds it in place

The smaller side gear follows, still showing slight signs of wear where the tabs sit from the broken ones

Ready for the clutch plates

First we fit the pressure ring

This should easily slot into place

Ready to start adding the clutches. The marks on the friction face look worse than they are. You can just feel the larger ones with your fingernail

Working backwards we start with a B plate

This slides onto the grooves on the gear

Followed by an A plate

I`ve purposefully misaligned the plate to show what NOT to do. The tabs need to line up with the pressure ring

Like this
Another B ring

Lowered into position

The final A plate

Ensuring the tabs are still aligned

The cone washer is next

The smaller part of the washer in the centre of the clutch isn`t touching, it`s the outer that is in contact at this stage.

This shows the orientation of the washer a little clearer

We are down to the final small washer

That sits in the middle

The final piece is the Cover plate

Before splitting I marked both halves of the case to ensure they go back in the same place. This isn`t critical but I did it for completeness

Carefully lower into place, the groove inside the plate line up with the tabs on the clutches and the pressure ring. It only needs a small side to side rocking motion to drop into place

The 4mm locating screw are next

Carefully, whilst holding the 2 halves together flip the case and tighten the screws. Tighten them in stages, don`t just tighten one down fully. Do it in several stages, so the pressure is equally applied whilst tightening.

I was reusing the ARP ring gear bolts, so gave them a quick clean with a wire brush


On the VW gearbox, the smaller internal recess of the ring gear sits on the diff

Compared to the larger recess which is the side the bolt heads are visible from

Place the ring gear on the diff, it my need a tap with a soft faced hammer although mine just dropped into place.
Hold the bottom part of the casing in a vice, but leave a SMALL gap between the ring gear and the vice, this gives the RingGear room to move as it is tightened onto the diff


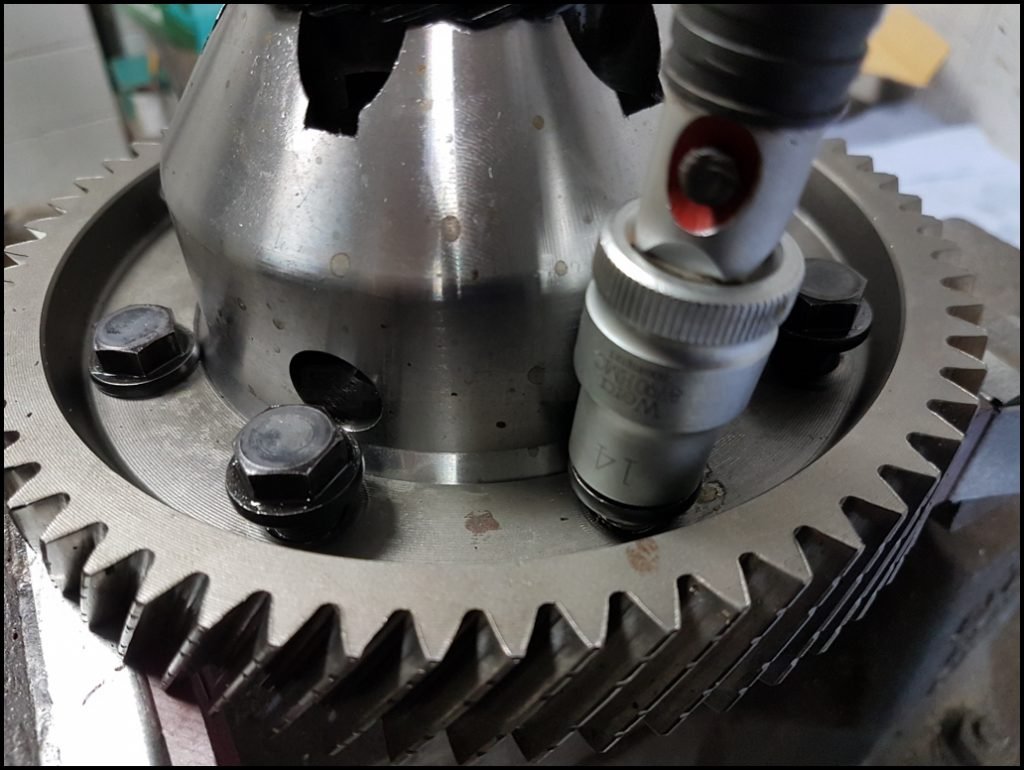
Nip up the bolts using a suitable socket after applying ARP lubricant. 14mm in my case.
Once again, do it in stages so the Ring Gear is pulled down squarely onto the diff casing.
Once all the bolts are nipped, they can be torqued to the relevant value. 45 ft/lbs in my case with these bolts. Work in sequence when doing this.

That`s it. A fully rebuilt Plate diff. ![]()

Follow in the bedding in procedure for your diff. Usually they are the same as the Kaaz one.
All new Kaaz LSD needs to be broken-in to seat the clutch plates. Applying too much torque when the unit is new will cause damage to the clutch plates and may result in plates forming an angle fit. Once these plates form an angle fit, the LSD is unable to function at 100% efficiency. This will also result in more chattering noise under low speed turns. It is very IMPORTANT to perform the breaking procedure as described below.
After breaking in I will be changing the oil. It`s only £7 a litres so it makes sense to get all the debris out from bedding in the plates. ![]()
I`m not sure if 30-minute non stop is really necessary though…..![]() I`d be throwing up after half an hour going in figure of eights !
I`d be throwing up after half an hour going in figure of eights ! ![]()

All clutch type LSD’s make chattering noise under low speed turns. This is normal for these types of LSD. The reason for this chattering noise under low speed turns is that the clutch plates are rubbing against each other thus giving you the limited slip action. If the break-in procedure is completed according to the diagram above and proper maintenance of the LSD is performed, the chattering noise will gradually decrease after accumulating some miles.