
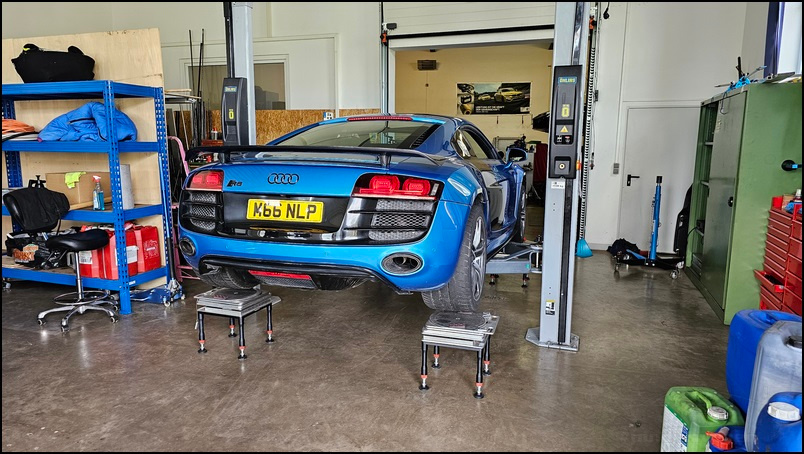
The R8 was always going to be the best build I could put together within a sensible budget, with the focus on spending where it really matters. Suspension is a key part of that—not just for road driving but also for track use.
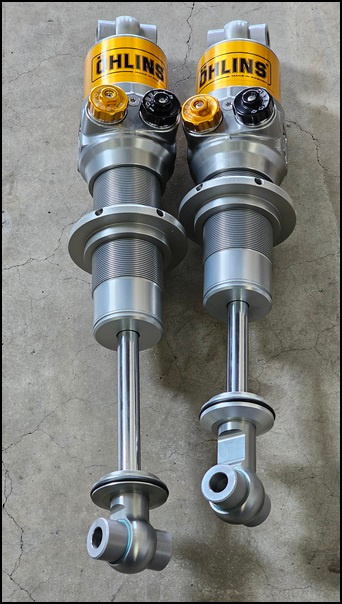
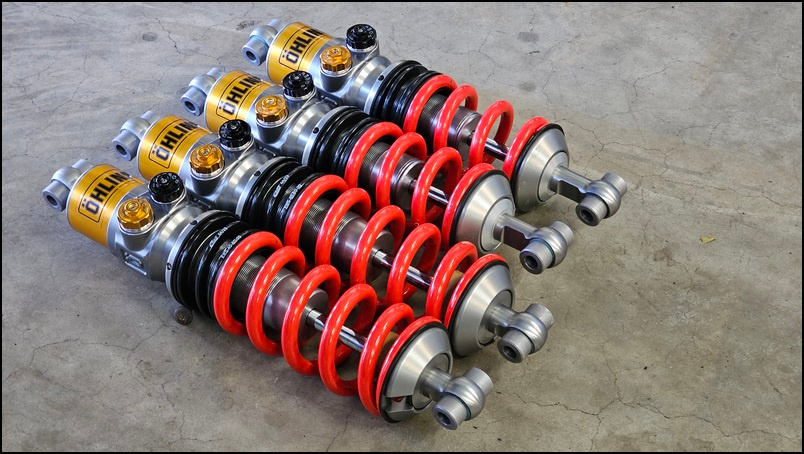
I first spoke to Christian Miller back in 2021 when I started considering an R8 as my next car. He’s the customer service manager at Öhlins, based in the Nürburgring industrial park and someone I’d met several years ago. In July 2023, we sat down for a proper discussion about options, eventually settling on a custom set of two-way TTX dampers. Christian put me in touch with Emerson Britnell, the owner of Engauge, a motorsport suspension specialist near the Nürburgring. Having worked at Öhlins as part of the team that developed the original TTX kit, he knows his stuff inside out. He builds dampers for GT3 race cars, track cars, and road cars, and when race teams keep coming back to him year after year—in an area overflowing with motorsport specialists—you know he’s doing something special.

You might be wondering why we didn’t opt for 4-way adjustment. I had a chat about this with both Emerson and Christian, and Emerson was confident he could build the dampers to achieve the right damping curve without the added complexity of 4-way adjustment. He’s done it for GT3 cars that only use 2-way dampers. In truth, unless you really know what you’re doing, fiddling with a 4-way damper can easily make things worse, and I’m the first to admit I don’t have the expertise to fine-tune both high and low-speed damping characteristics properly, so we settled on a custom valved 2-way damper.
Once the TTX kit arrived, I drove the R8 to Emerson’s workshop to replace the leaky Mag-Ride dampers. This wasn’t just a case of swapping out the parts and calling it a day—Emerson was clear that if he was supplying the dampers, it would be a full start-to-finish process, including setup. And as the installation progressed, it quickly became obvious why.
Emerson typically works alone, but he was happy for me to handle the spanner work while he focused on other jobs. He built and adjusted the dampers as needed, pointing me in the right direction when necessary. I don’t mind getting my hands dirty, so it worked out well. Rather than going through every detail of the installation, I’ll skip ahead to what really matters—the results, with the installation photos at the end.
After fitting the dampers, I took the car out for a 45-minute drive on the Nürburgring’s surrounding roads, which is hardly a chore. This gave everything a chance to settle, and when I got back we checked the ride height.
He asked me how it felt. I knew it was better, but I struggled to explain exactly how. It’s a bit like wine tasting—you know when something is an improvement, but putting the nuances into words is another matter.
To help me understand, Emerson took me to his local test road for a proper drive. But this wasn’t just a blast down the lanes—he was assessing everything. After a few hard accelerations, he pulled over. “The nose is lifting too much, and the rear is squatting,” he said. A quick bump and rebound tweak, and we ran the road again. The difference was staggering. I asked how many clicks he’d adjusted. “Three—I’m coarse tuning here.” Just three clicks, and it felt like a different car.
We went through a sequence of bends with some nasty bumps. Something felt slightly off. Emerson adjusted the front and rear by one click each and drove it again. Even from the passenger seat, the improvement was obvious. I couldn’t get my head around how just one click could make such a difference. That’s when he explained the beauty of the Ohlins—one click has the same effect anywhere in the adjustment range, so you find what you like and fine-tune from there.
After a few days of road driving, it was time for the track day. On the first lap, I deliberately ran over some kerbs to see how they felt. The R8 now had the same quality damping I’ve experienced in properly set-up cars—kerbs didn’t unsettle it, the car wasn’t bounced sideways, and as soon as I dropped off them, it settled immediately without a secondary bounce.
I focused on the feel of the car, and after half a dozen laps, Emerson asked for my feedback.
“I’m struggling with understeer,” I said.
“What phase of understeer?” he asked.
“…What?”
“Corner entry, mid-corner, or corner exit?”
Ah. We were at that level now. Just saying “understeer” wasn’t enough. I thought about it and realised it was happening on initial turn-in and mid-corner. I explained this to Emerson, and he jumped into the passenger seat to see for himself.
That guy misses nothing.
Halfway through the lap, he turned to me. “Remember how we said you’d start with toe-in at the front and move to toe-out once you got comfortable? We need toe-out today.” I hadn’t expected to be pushing on so soon, but here I was, already driving hard. Sure, my years in FWD cars meant my lines, entry speeds, and throttle control were all wrong, but the confidence-inspiring setup meant I was already pushing more than expected. We were comfortably running sub-8-minute laps, my first-ever lap in the car had been a 7:54—and I was getting quicker each time.
Without changing the front geometry, we couldn’t do much about the initial turn-in understeer, but Emerson made a small damper tweak and adjusted the rake by one turn on the spring platforms. Heading back out, the difference was astonishing. Mid-corner understeer was nearly gone. I asked him how many clicks he’d changed. “Just one.”
This is what you get with proper dampers—small changes that make a clear, repeatable difference.
As the day went on, I started to have enough mental bandwidth to really focus on what was happening with the car. At first, it was a revelation—the improvements were immediately obvious. But after a couple of days and countless laps, it just became the new normal, and I stopped noticing how much better it had gotten. It’s funny how that works. You’re blown away at first, but then it becomes standard, and you don’t even realise until you jump in with a friend in their car, which was on some BC coilovers. Suddenly, I was reminded of all those bumps I’d already forgotten about—the ones that the R8 now effortlessly dealt with.
Since fitting them, I’ve driven thousands of miles on both road and track. On really poor road surfaces, they’re bumpier than the Mag-Rides in comfort mode, but that’s to be expected with the stiffer springs. I soften the damping for road use, but there’s only so much you can do. For the track, I’ve moved to toe-out at the front and reduced the rear toe-in slightly, and the car feels even better.
I’ve taken out dozens of passengers, and the feedback is remarkably consistent. Comments like “These dampers are incredible” and “The damping is really good, isn’t it?” keep coming up. Many have noticed that bumps they always feel in their own cars are almost non-existent in mine. More than once, I’ve heard, “This feels like a different track—where have all the bumps gone?” or “So this is what proper dampers feel like.” One R8 owner even admitted, “I’ve got an R8, but the damping isn’t anywhere near this level.”
My aim was to set up the best compromise—a road car that’s also fun on track. I reckon we’ve nailed it. Spending the money on proper dampers and setup has transformed a good package into a great one.
It goes without saying that I recommend Emerson without hesitation. He listened to what I wanted, offered his expertise, but never dictated the choices—that’s important. He knows far more about suspension than I ever will, but he understood my requirements and built the dampers to suit.
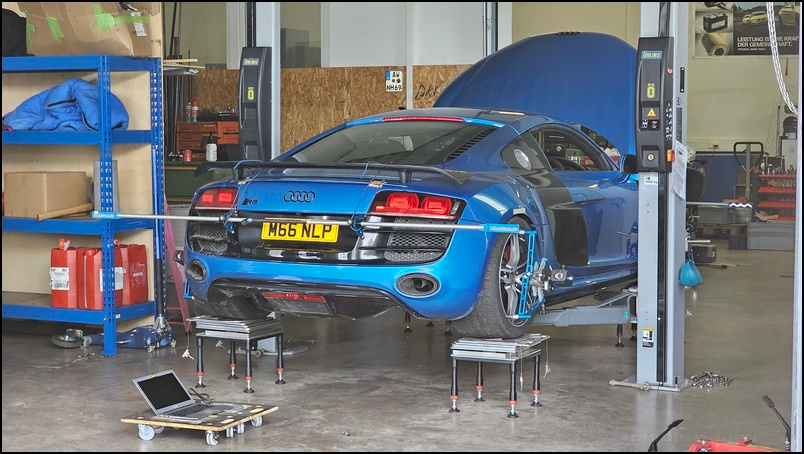
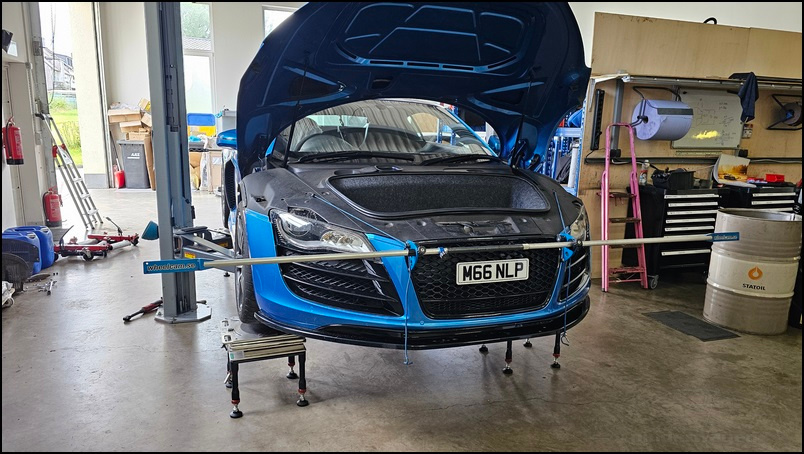
Installation.
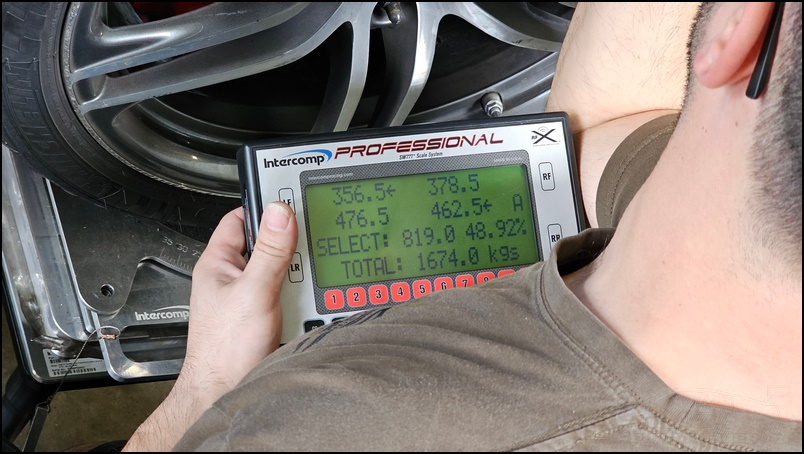
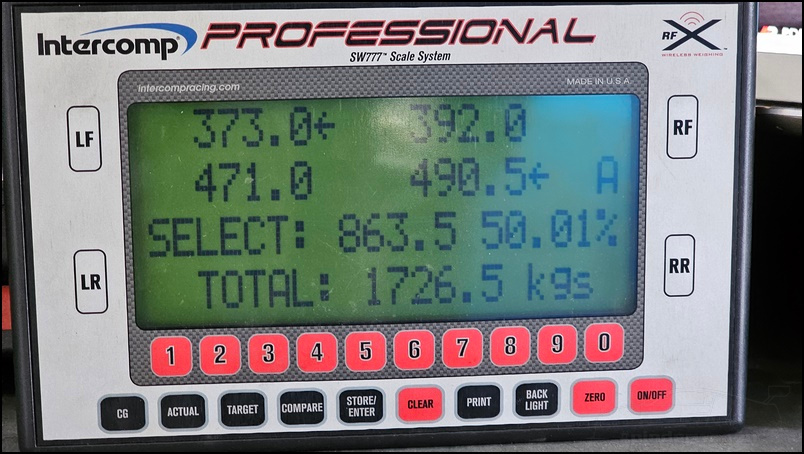
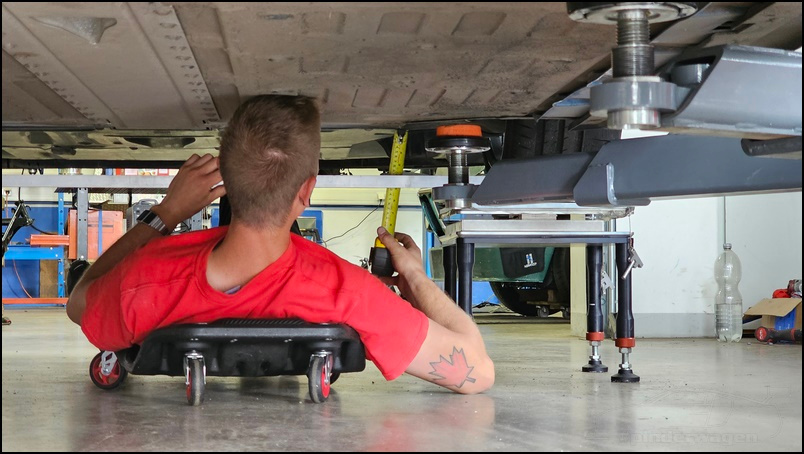
First job was to measure the current ride height and corner weight the car as it was, with half a tank of fuel.
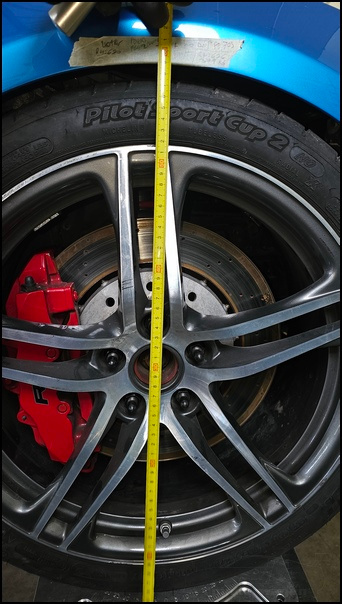
Ride height is measured from a line on a piece of masking tape stuck to each wheelarch to the bottom of the rim. This is then used as a reference for every measurement going forwards.
To corner weight the car, scale platforms are positioned under each wheel and the car then lowered.
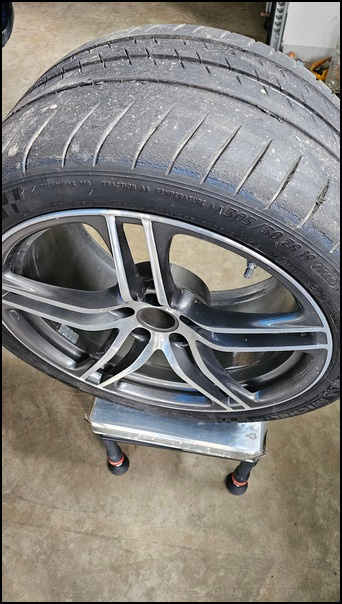
It’s a heavy thing, 1674kg with no driver ! This is something I simply can’t do anything about and it’s probably the biggest reason you don’t see many R8’s as track cars compared to Porsches. They are just that bit too heavy. That weight means higher wear on tyres and brakes, quick direction change is that little bit more sluggish than you’d like. I’ve managed to get a few more kg out of the car since fitting the dampers, but I’m never going to get it under 1,600 whilst keeping it as a road car and that’s just something I’m going to have to live with.
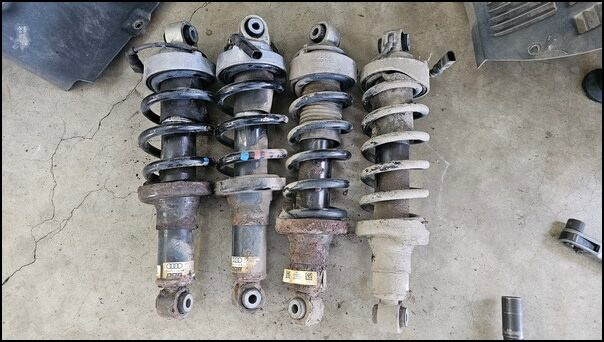
Next was to remove the magrides. 2 of them were leaking so I was quite happy to get rid of them ! Whilst the car was in the air I removed the wheelarches and undertrays that were in the way and would affect the install.
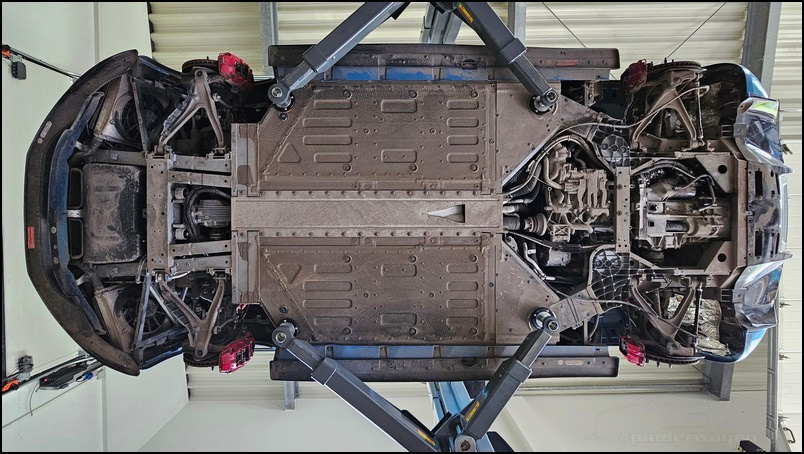
I quickly found working on the R8 is so much easier than on the Golf. Not a single bolt was seized, the dampers simply lifted out in one piece.
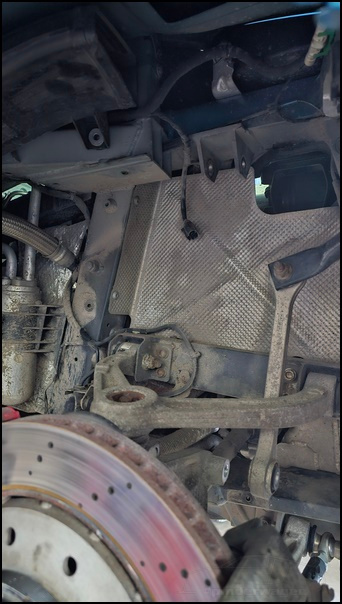
They are the original units and as many owners are well aware, they are known to fail. They are one of the weakpoints on the R8 and along with the brakes, they are the 2 things people need to look for when buying an R8. I’d spotted the leaking dampers before purchase as well as the brakes were in need of new discs and pads. That’s not a problem, I planned on replacing them anyway !
With the dampers removed, the wheels were lifted to simulate maximum compression, this is used to set the spring length and bump stop inside the dampers to ensure even under extreme compression, the tyre doesn’t touch anything it shouldn’t and the springs don’t get coil-bound.
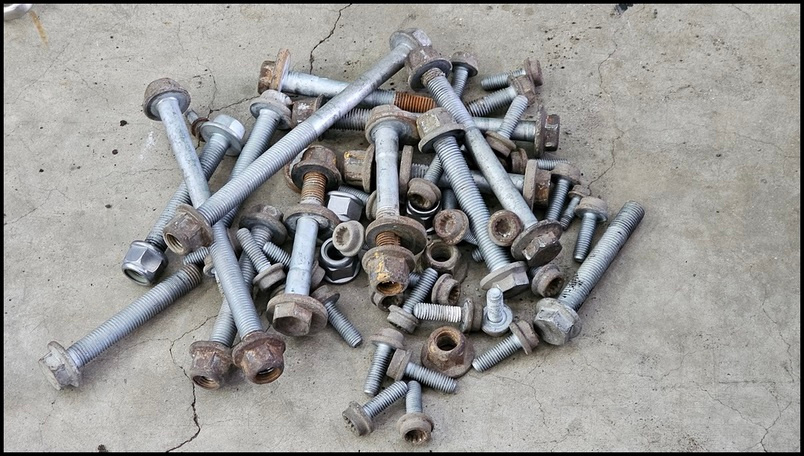
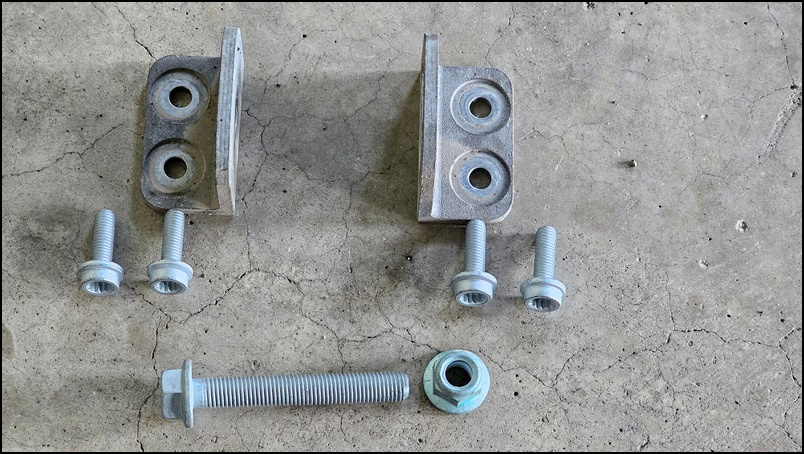
With the dampers out of the way and the necessary measurements taken, it was time to replace some bolts. The car is 15 years old and as far as I’ve been able tell, it’s completely original underneath. As I’ll be giving it a lot of abuse, it seemed prudent to replace ALL the bolts on the suspension.
These were sourced from Ricky at REPerformance, all original Audi bolts. Cheap they are not..

I kept the original bolts, no harm in keeping a spare or 2.
It’s easier to completely remove the brakcets and bolts seeing as we were going to be doing a full alignment afterwards.
The new bolts and bracket ready to be refitted.
Refitted but at this point left loose as there will be a lot of adjustment before anything can be fully tightened.
Emerson then asked me to weigh each corner, he wanted to measure the unsprung weight at each corner as this along with the car weight is used when setting the internal damper valving as well as choosing the spring rates.
The wheel and tyre is also weighed to get a total unsprung weight for each corner of the car. I measured one front and one rear.
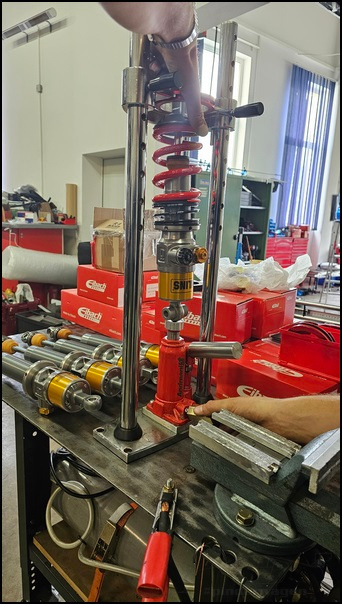
The dampers are initially fitted without springs.

They aren’t bolted in at this point, it’s purely a first test. As I was to find out, there is a LOT of fitting and removal required before the final fit.
The damper travel was again checked to confirm the internal bump stops were the correct length.

The springs were fitted, with the jig this took seconds. The platforms on the Ohlins require a 1/4 turn to remove so swapping springs takes seconds.
This was the first spring length used, Emerson fully expected to tweak this once the ride height was set. He was quite confident the spring rates were correct for what I needed but they are easy to swap if required.
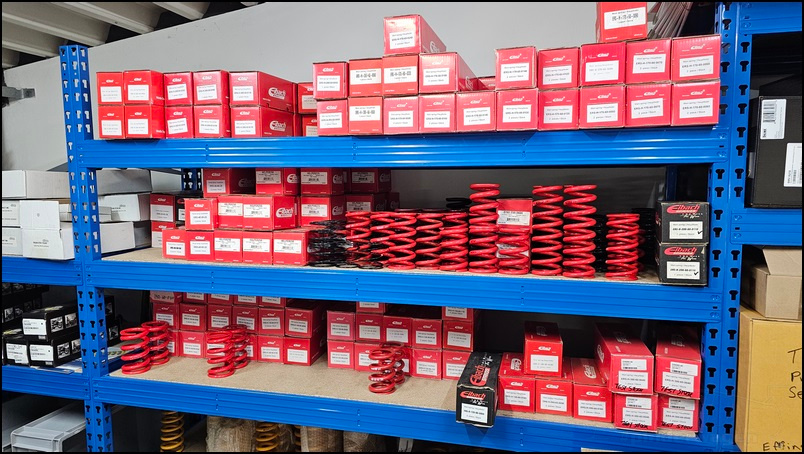
Emerson uses Eibach ERS Springs, he has a huge stock which meant he could try different lengths and spring rates in minutes if needed.
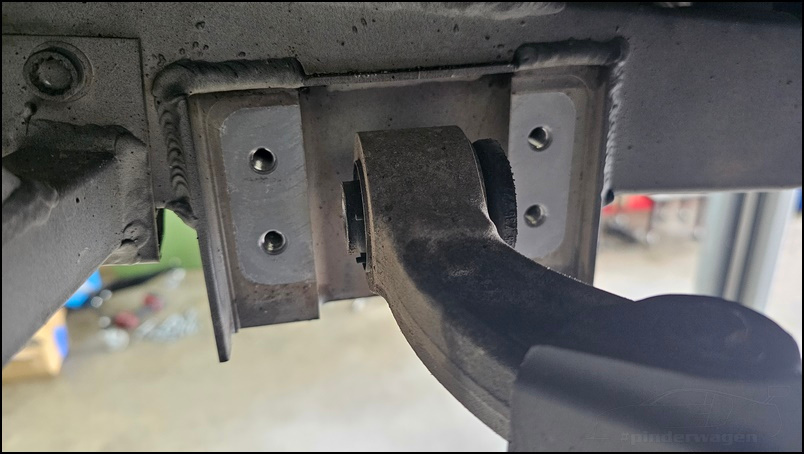
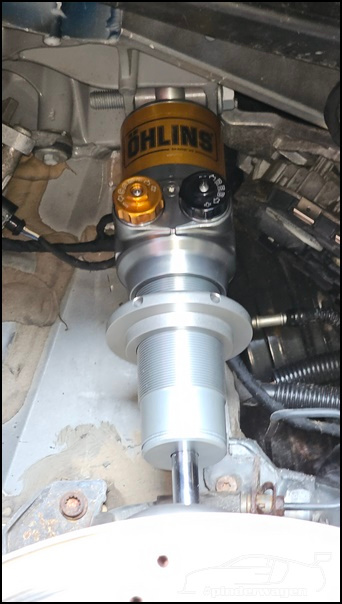
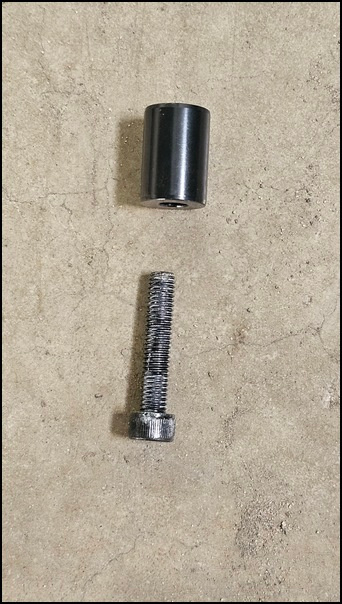
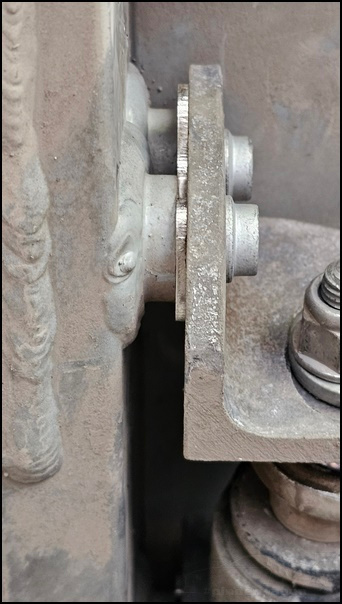
Then we hit a snag. The brake line bracket caught the damper. If it was bolted to the wishbone, the bracket fouled the spring.
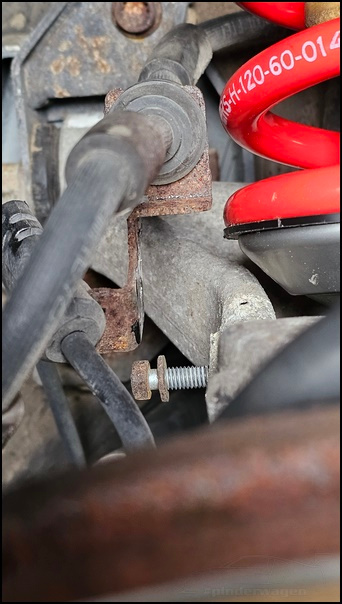
Emerson said “I’ve come across this before.” Walked off, came back a few minutes later with a machined aluminium cylinder and longer bolt. This fits between the bracket and wishbone, spacing it out enough to clear the spring.
![]()
I’d made up some magride-delete resistors. These are needed to stop the car throwing an error when the magrides are disconnected.
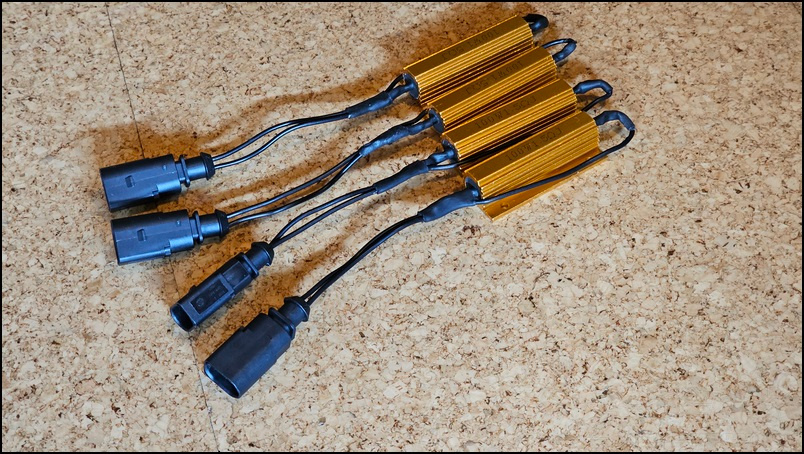
These are simply plugged in and cable tied out of the way.

Next it was time to do the first alignment and corner weighting. The R8 camber is set by shims between the wishbone and chassis, with fine adjustment by an eccentric bolt.
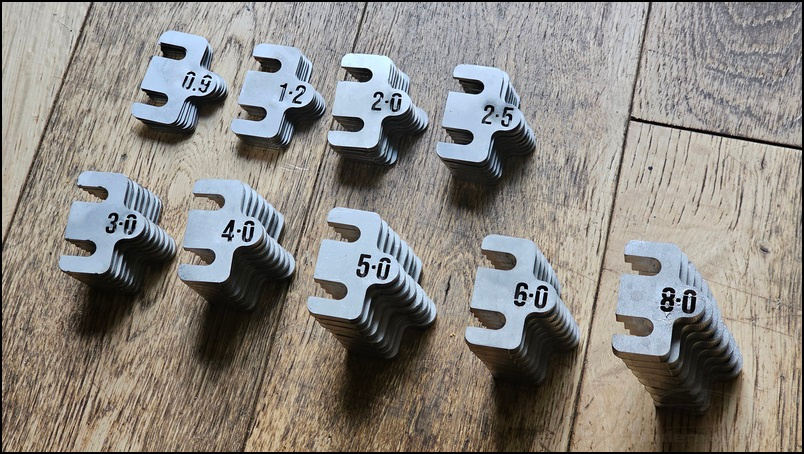
I drew up and had laser printed a selection of shims. The 8mm is most likely too big, but I’d rather have them with me than find we don’t have enough with us.
You can see here a shim between the bracket and the chassis, the bolts are loosened and them the shim slid into place. You often see shims that have an angles cut-out so they can be slid over the bolt and hold themselves in place, the brackets sit in a reces on the chassis on the R8 so there is no room to design the shims like that.
Before lowering the car to the scales, the pads were checked and adjusted to be level. ‘near enough’ simply isn’t good enough.
With the car lowered we first setup the car to be somewhere close. Adjusting toe changes camber. Changing ride height changes toe. It’s one of those jobs that takes time and you have to be methodical with.
Adjust, measure, adjust and repeat.
We had a discussion about driver weight and passengers. Normally cars are setup with just a driver but pretty much every lap I drive is with a passenger so we added ballast for a driver and passenger (approx 80kg each) and half a tank of fuel. This is the configuration I’ll be on track with almost all the time.
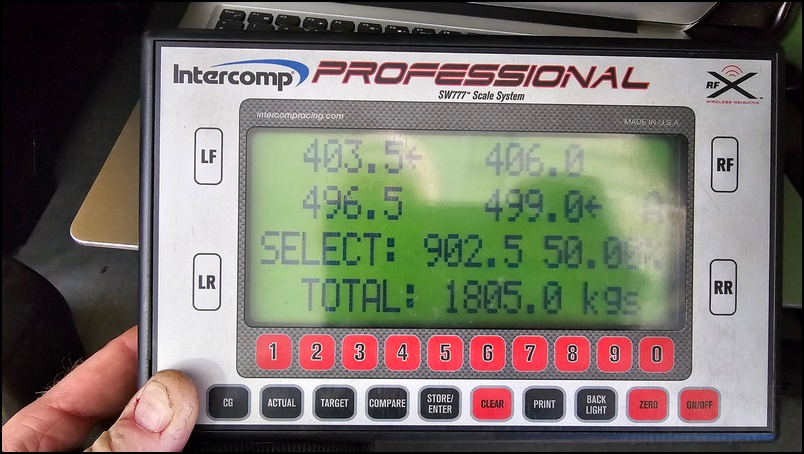
Removing the passenger weight obviously affected the weight on the left of the car.
The alignment rig is a wheelcam.se setup, it’s very accurate and Emerson ensure it was all setup properly then left me to it.
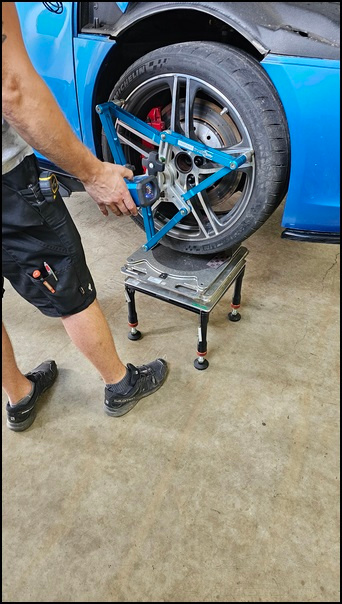
This is mid adjustment. That decimal point cost me far more time than it should have. I know it’s only 0.1 of a degree and breathing on the spanner made more difference, then you tightened everything and it moved 0.2 so you had to do it all again, learning how much it moved when you tightened everything so you could have it reading under / over knowing it would change as you tightened everything.
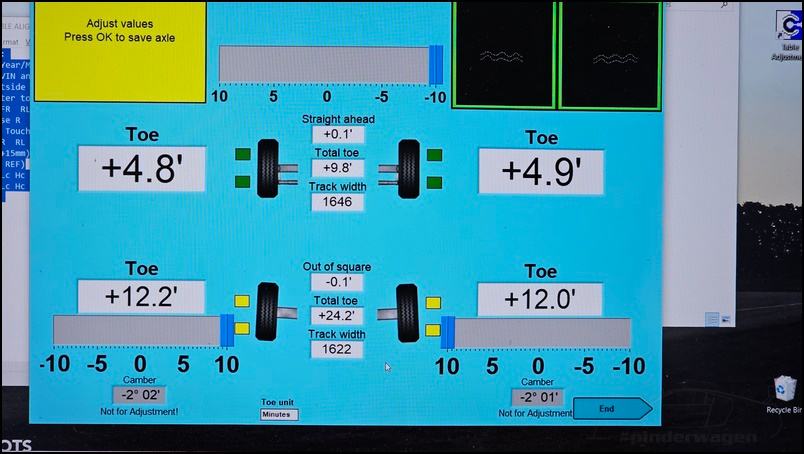
At this point there will be some people pointing out my settings aren’t what they’d have chosen. I agree, but this was after a long chat with Emerson. I expained I was coming from 17 years in the Golf and knew exactly what it would do. The R8 is the first mid engined car I’ve driven and I was happy to live with some understeer whilst I learned the car. Emerson explained after I was more familiar with it, I’d find the front needed some toe out to dial out the turn-in understeer, but he explained that was an easy thing to do and could be done next year after I’d done a few trackdays.
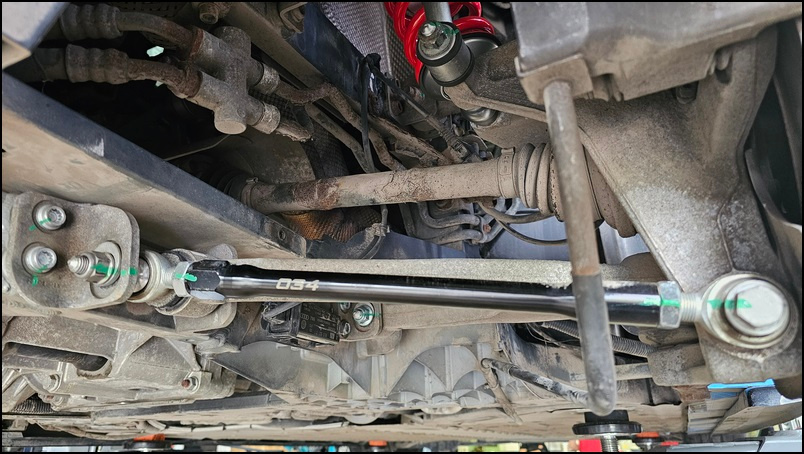
Rear toe is similar, 12minutes is quite a lot but the plan is to reduce that as I get used to the car (I’ve settled on 9′ per side toe in since writing this and driving more on track). Adjustable rear toe arms are needed as the stock arms are fixed and have no adjustment. I fitted some 034 Motorsport ones, but that’s a saga for a different post…
Camber was a best guess, as I plan to drive on the road and track, there has to be a compromise. Too much camber and I’ll wear out the inside edge of the tyres on the road. Too little and I’ll wear the outer edge on track.
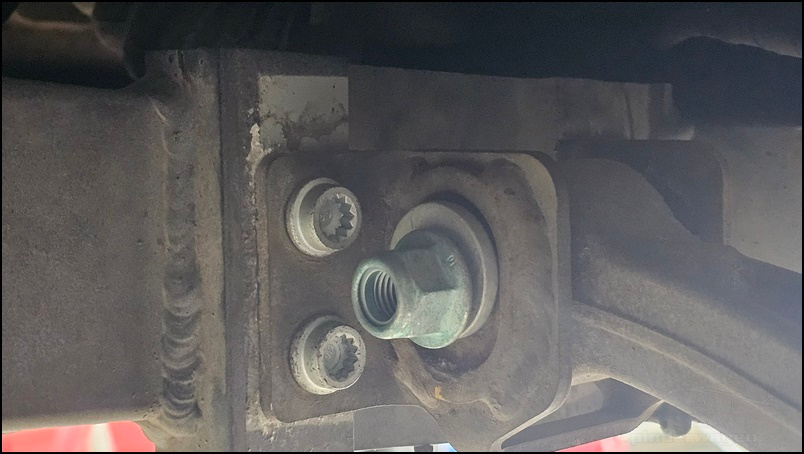
Only when everything was adjusted correctly did we sit the car on the stands and tighten the wishbone bolts. If you do this in the air, it puts a preload on the bushes and wears them out quickly. Emerson was keen to fit spherical bushes but I’ve had that before and the extra noise and ride on the road isn’t something I want to compromise on. I know there will be extra play in the bushes but that’s always an option for the future if I feel it’s necessary.
Alignment was checked again and when everything was spot on, the bolts were all torqued and marked with a paint pen.
Once everything was complete, Emerson took several ride height measurements. These are for his jobsheet and he can refer back to them in future if I request a change in handling or simply want to check what the car was setup to when installed.
Undertrays and arch liners refitted and it was time for a test drive It took 2 full days to install with another half day including removing/refitting the archliners and undertrays which seems like a lot but this wasn’t simply a case of bolting in 4 dampers. I can do that in under an hour, this was a full measure, build, install, setup and test.
I mentioned earlier how Emerson quickly adjusted the damper. The bump and rebound adjusting screws are just accessible with a long extension and 12mm socket.
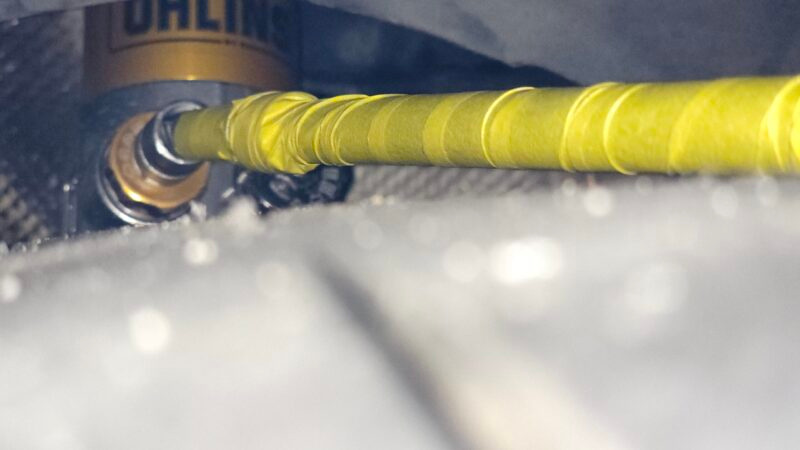
I wrapped the extension in masking tape to protect the paintwork.

I’ve never gone to this level of detail before, I’ve setup the Golf, had the geo done properly and tweaked the toe and camber to improve it, but it was always trial and error. That wasn’t the case here, everything was done as accurately as possible and the difference in driving the car showed how worthwhile that was.
People have asked if I think the Ohlins were worth it. My answer is 100% yes. I’m building the best R8 I can within a budget and I know fitting cheap dampers would be false economy and I’d only end up changing them for something better in the future anyway.
Since fitting these dampers and the subsequent setting up, Emerson now offers the full kit, details can be found here ForRacingUseOnly R8 Ohlins TTX Kit