My Golf had zero engine issues on the last outing at DN in May. The wastegate broke as I`ve explained elsewhere but that was all.
Upon returning to the UK I fixed the wastegate and at the same time checked the condition of the piston crowns using a boroscope Matt bought me for my birthday. All 4 had no damage whatsoever, I was just checking to make see how good the camera was not because I thought anything was wrong. 
I was at CoventryMotofest the other weekend, unloaded the car and left it idling for 10 minutes or so as usual. Went out for the `parade / sighting` laps with Cat in the passenger seat.
First lap was really steady, following the car ahead and just seeing where the road went.
After around 20 seconds into the 2nd lap I said to Cat “It`s really strange driving without a helmet at low speed, I`m hearing noises I never usually hear. I never knew the engine sounded this tappety, it`s surprising how much the helmet muffles that“
10 seconds after that it made ever more tappety noises and just stopped
I had taken no tools with me at all so was unable to perform any diagnosis over the weekend but I said to several people it sounded like a valve/top end issue.
I have a cheap USB boroscope that connects to the camera and that clearly showed some marking to the piston crown.

The following photo was taken with camshafts removed Inlet valve 2 is stuck Open

This engine was built in September 2014 and the head hasn`t been removed since but I knew I had to take the head off to investigate further.
At TDC, the crank was lined up exactly with the mark on the cover so I knew that pulley hadn`t moved.
Piston looks in brilliant condition. ZERO signs of Det. Mixture looks perfect. Well, apart from the valve damage…. 

The vernier pulley has slipped.
Damaging the camshaft in the process.

If you look really closely you can see the cracks in the camshaft around the keyway area

Adding the damage in the camshaft and the vernier is obviously sufficient to cause the belt to move enough to cause valve to piston damage. All 8 inlet valves are bent and all 4 pistons have marks from valve contact.

I’m absolutely delighted with the combustion chamber condition, zero signs of det showing the timing and fuel mapping is spot on.
The cylinder head also shows no marking at all
Before removing the old pistons I gave the block a quick clean.

The bores are still in superb condition with the hone marks clearly visible
Gurds very kindly sent me 7 standard pistons he no longer needed. I selected the best 4 and gave them a good clean

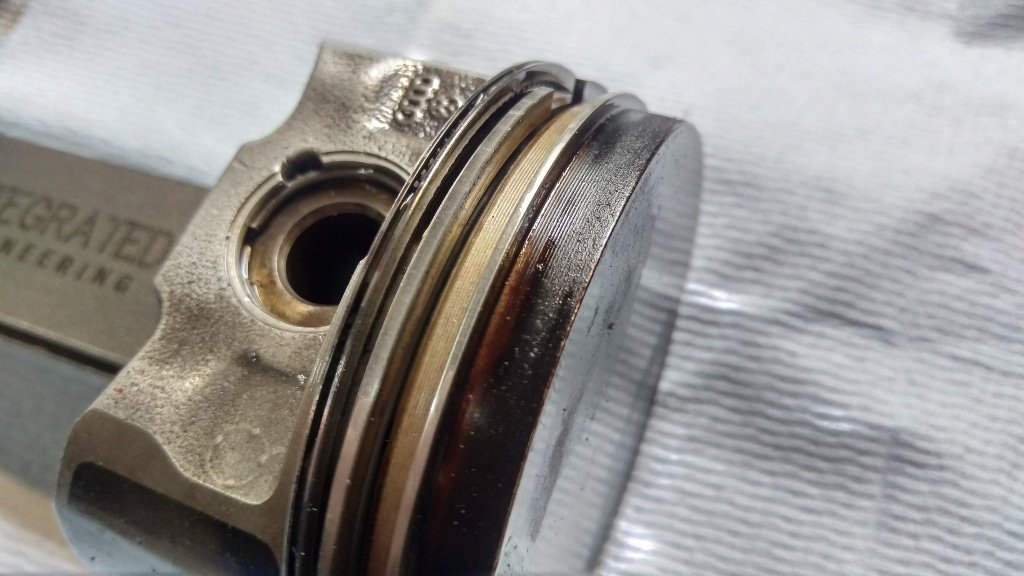
The old pistons were in great condition. No gases blowing past the rings, no damage between the ringlands or signs of cracking.
Removed the old pistons and checked the little end for any signs of wear. As you can see, the factory hone marks are unworn without the shiny finish you get when they start wearing
A new set of rings is around £100. If they were needed I would have bought a set without hesitation. I`m sure some people will disagree but the rings and bores were undamaged so I swapped the rings onto the replacement pistons. Why ? well quite simply because they were already bedded in to the bores and I saw no reason to replace what wasn`t worn.
Replacement pistons and rods all built up
When I checked the big end bearings in March 2016 I noticed some odd wear and it was suggested that the fuelling was too rich and caused that.

However the fuelling has been running exactly where it should be since then but the bearings were starting to show the same type of wear on 2 cylinders on the top half bearing. I suspect the downward power stroke is causing the oil to compress into the bearing material and cause this damage. It`s much less than before but still unacceptable. I`ll either replace the bearings annually or look for some with a stronger bearing material. Suggestions are welcome but obviously the preferred route is to upgrade the bearings. I believe it is simply because they are designed for a n/a engine and I`m using them in a forced induction environment and they aren`t strong enough.
Since writing this, a friend sent me the link to the Mahle Engine Bearing Analysis document which seems to confirm my own thoughts.
“19 Surface fatigue APPEARANCE
Bearing surface cracked, small irregular areas of surface material missing from the bearing lining.
DAMAGING ACTION
Heavy pulsating loads imposed upon the bearing by reciprocating motion within the engine cause the bearing surface to crack due to metal fatigue.
Fatigue cracks widen and deepen perpendicular to the bond line. Close to the bond line, fatigue cracks turn and run parallel to the bond line, eventually joining and causing pieces of the surface to flake out.
POSSIBLE CAUSES
Overloading (lugging, detonation, or overfueling).
Bearing material of inadequate fatigue strength for application.“
Pistons fitted complete with new big end bearings and 2x Head gaskets ready to refit the head..
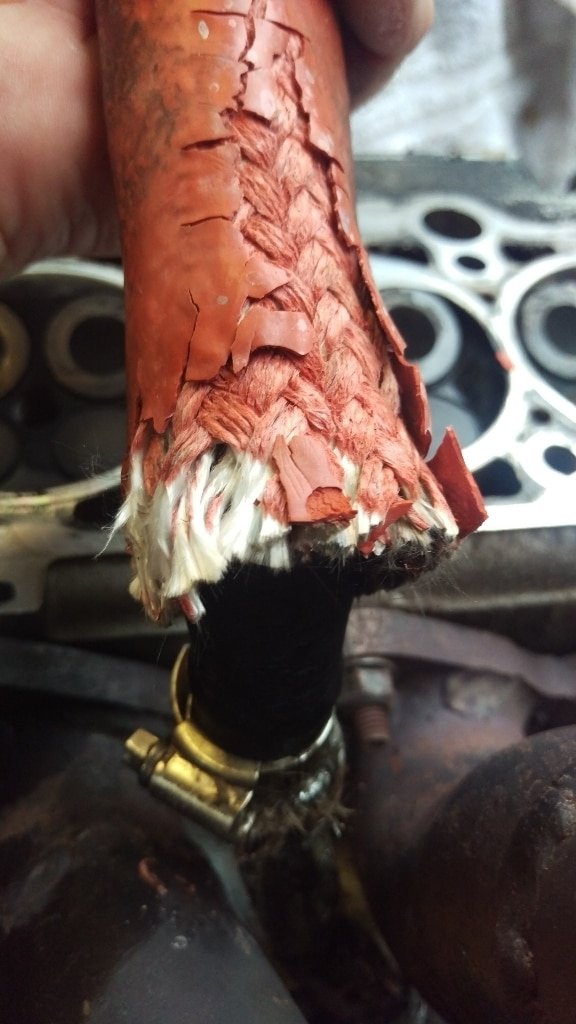
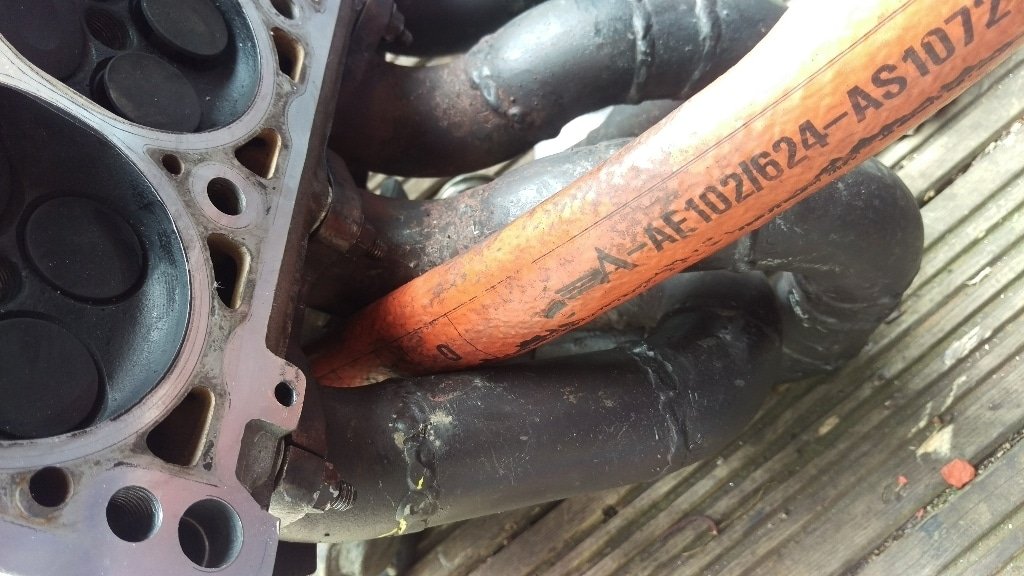
Whilst the head was off I had a look at the Turbo oil drain, the protective sheath was showing signs of high temperature a from where it went between the runners, I couldn`t push it any further up as it wouldn`t go past the jubilee clip.
The hose underneath was showing the signs of getting too hot as it hadn`t been fully covered by the sheath once that had opened up a bit.
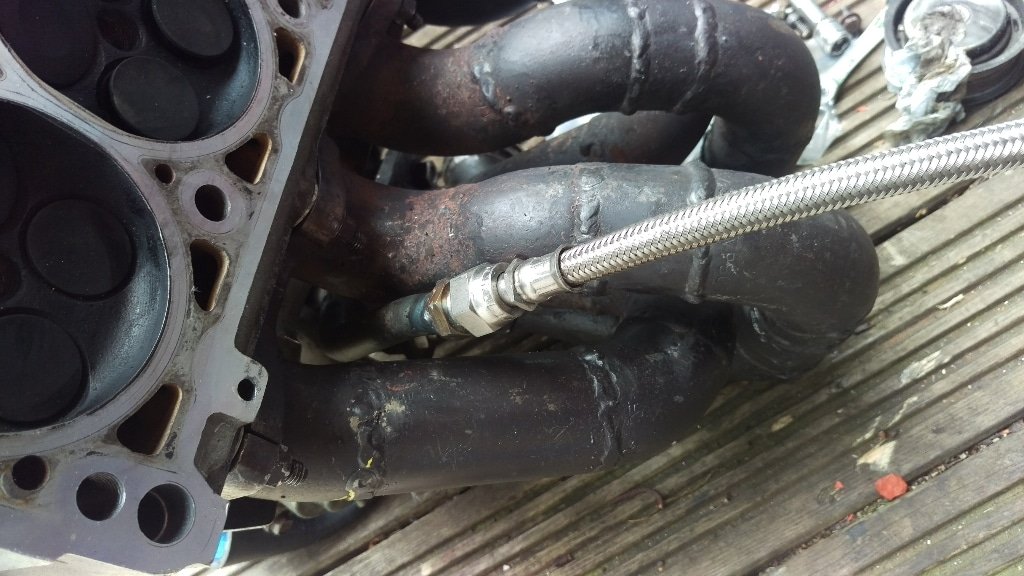
Seeing as the head and sump were off I welded on some threaded adapters to the drain hose and sump return then fitted a teflon inner with stainless outer braided hose with crimped ends.

Not only is it far easier to swap if it fails in future (I bought a spare), but the ptfe lining is rated to a higher temperature than the rubber AND the insulation sheath can now be pushed further up the pipe, it was stopped by the jubilee clip before.
I can remove / replace the hose in situ in a few minutes, no need for all the faffing around I had to do with the rubber hose. I also angled the sump return to bring it closer to the block and further from the driveshaft so that can`t ever rub through again. Yes, I know, I should have done this in the first place….
The camshaft pulley had been on the car and untouched since September 2014 so I really don`t know why it decided to slip at Motofest. The bolt was still tight when I removed it.
It has been suggesten lightly lapping the crank pulley bolt to the end of the pulley helps remove high spots to reduce the chance of microslip between the 2 faces to stop them slipping in supercharged installations where the pulley takes more load. Even though I have never had this happen before I wanted to reduce the chance of it happening again.
Put some paste on the mating face of the pulley and end of the camshaft after tapping the locating pin out of the way then rotated the pulley back and forth by hand whilst pushing the pulley towards the camshaft.

After a few moments the pulley and camshaft had a dull finish showing there were no high spots which would have reduced the effective clamping areas. I know it`s overkill and not necessary but for the sake of a few minutes it made sense to be certain.

The pulley was bolted to the camshaft with a new bolt and torqued up. Head refitted with all new inlet, exhaust and rocker gaskets. Engine fired up first time, ran up to temp without issue and zero oil leaks.
I still don`t quite understand why the pulley slipped when it hadn`t been touched for 3 years but at least it was at low revs so didn`t cause a catastrophic failure. The head I fitted is the spare I had built and was sat on the shelf. I`ll strip the one I removed and see if it just needs a set of inlet valves or is scrap.
What this has given me is a lot of confidence in the way the engine is holding up to the boost I`m running. The pistons were in fantastic condition and the combustion chamber showed how good the mapping is. It has been suggested this should also give me confidence to turn up the boost…….
Whilst it was annoying to miss out on driving at motofest, it could have been lap 1 of Ringmeisters in a few weeks. Now that would have been annoying.


